Remove Driver Booster Effectively - Windows Uninstall Guide
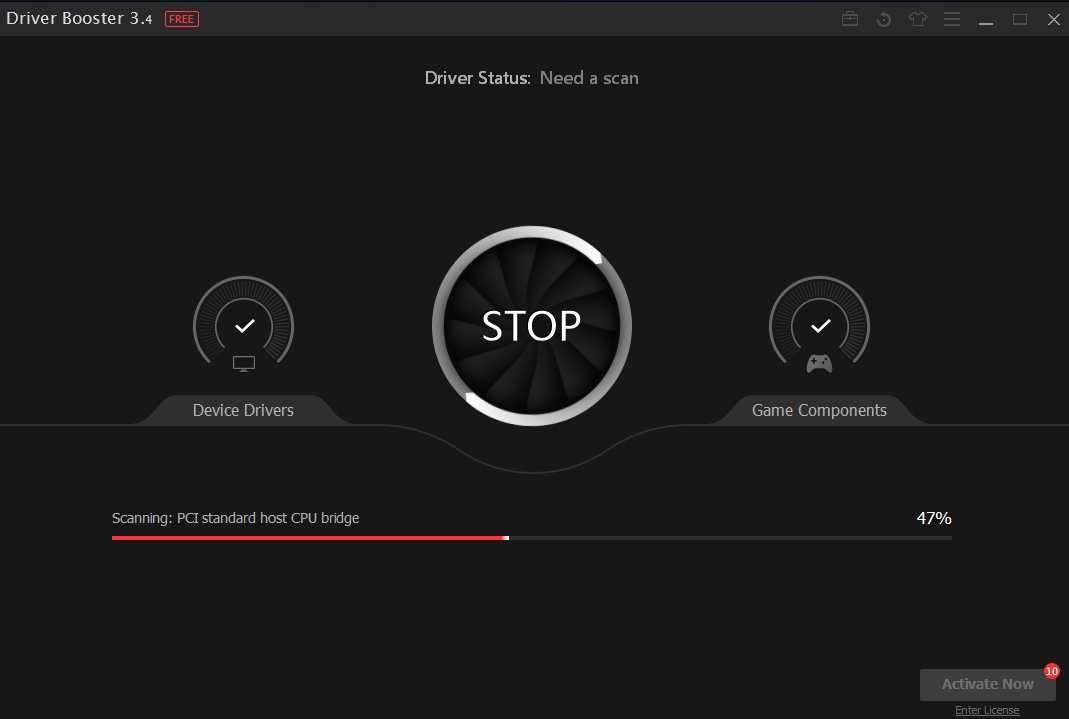
Driver Booster is a driver updater offered by IObit to maintain hardware devices by updating and installing outdated, missing, and faulty drivers. It officially claims to have over 200,000 drivers in the online database, and it allows users to download and install matched drivers for all computer devices in one click. However, some users complain Driver Booster fails to work properly at times for various reasons, and they also point out that the latest version does not perform as well as the older ones.
Whether you wanna replace Driver Booster 3 with previous version, or you have decided to uninstall it permanently, you might come across problems in the uninstall of Driver Booster. Driver Booster refuses to be uninstalled? Some of its components cannot be deleted after normal uninstall? Look for an effective way to get rid of this program? This post shows you feasible solutions to uninstall Driver Booster .
Solution 1: Manually Uninstall Driver Booster & Delete Leftovers
Once installed, the program will show up in the list of installed programs located in Windows Control Panel, so you can uninstall it through Windows built-in applet. Besides, some programs has its specialized uninstaller stored in the installation folder, and you can directly run the executive file to perform a uninstall. Let’s begin now.
Step 1. turn off Driver Booster
If Driver Booster is running, you should turn it off prior to the uninstall. Just right click on Driver Booster icon in the system tray and choose Exit option.

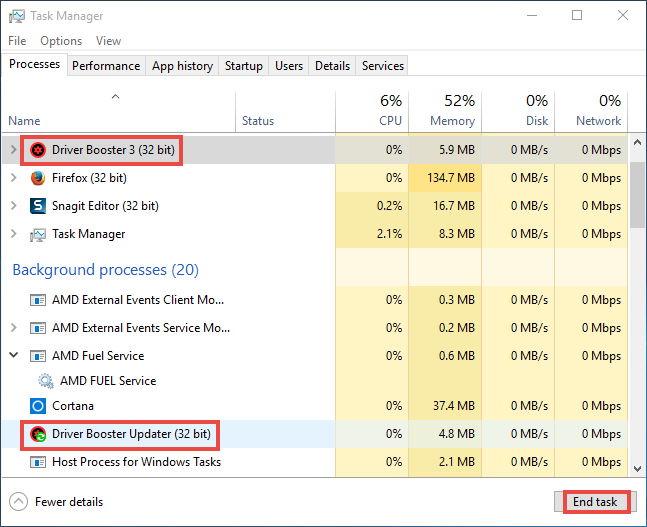
Alternatively, you can terminate background processes in Task Manager:
- Right click the taskbar at the button and select Task Manager from the list.
- Select the processes pertaining to Driver Booster and click End Task button.
Step 2. uninstall Driver Booster
On Windows 7:
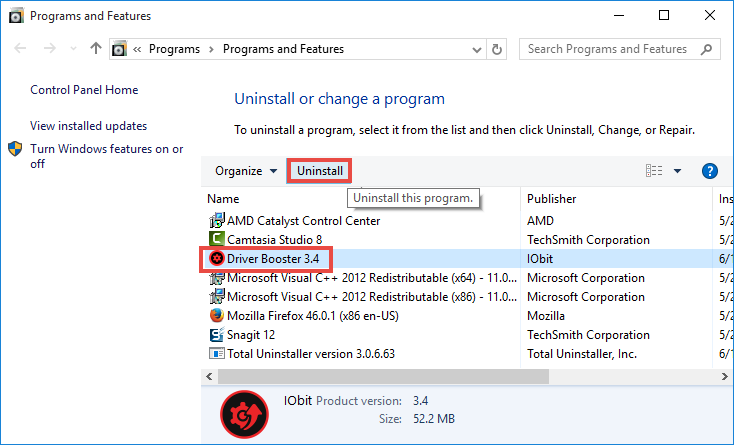
- Access to Start > Control Panel > Program to open Programs and Features panel.
- Scroll through to locate Driver Booster, highlight its icon and click Uninstall.
On Windows 8:
- Right click Start menu and then click Programs and Features from the list.
- Highlight Driver Booster and click Uninstall to begin the uninstallation.
On Windows 10:
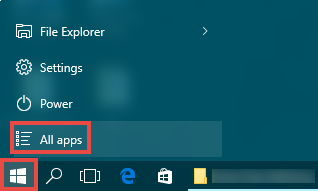
- Click Start menu, and click All apps to open the list of installed programs.
- Scroll down to find Driver Booster, right click on it, and choose Uninstall.
- Click Uninstall in the new opened window to activate default uninstaller.
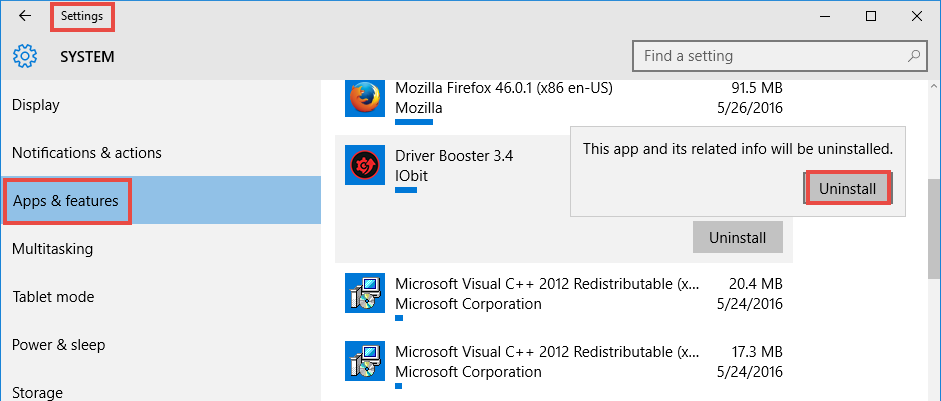
Windows 10 users can also click Start > Settings > Apps & features, select Driver Booster in the list of apps, and click Uninstall twice to start the uninstallation.
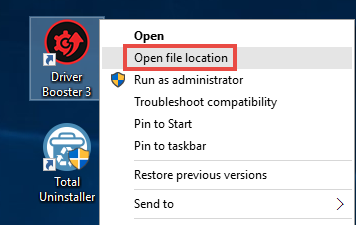
Then how to uninstall Driver Booster through its dedicated uninstaller? Well, you can run the executive program in Driver Booster folder by doing the followings:
- Right click Driver Booster, and choose Open file location from the list.
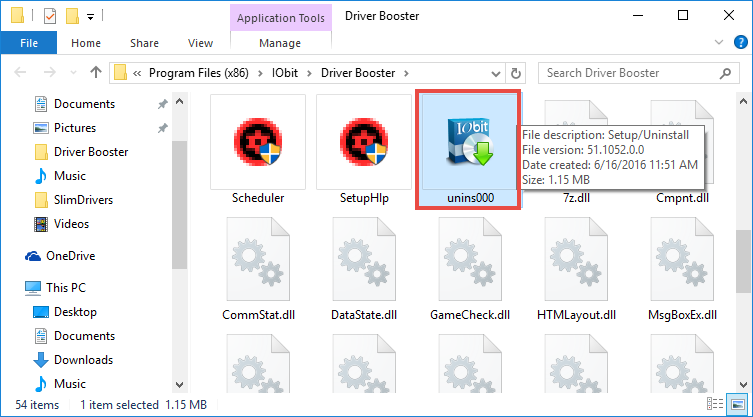
- Scroll through in the opened window to locate the file named unins000.exe.
- Double click to run this program, and follow prompts to complete the process.
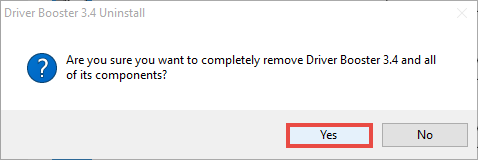
- Click Yes in the Driver Booster Uninstall dialog box to start the process.
- After it is completed, click OK to exit the wizard, and reboot your PC.
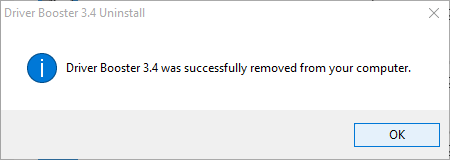
Tip: generally speaking, if the program is installed properly, you can easily uninstall it by the ways listed above. But when some of the executive files are damaged or missing, conventional means may fail to work, and issues show up like Driver Booster doesn’t appear in the list of installed apps, or there is no response when you click Uninstall option. If that’s what you are faced with, try this: run Driver Booster install package to cover corrupted/missing files, and then uninstall it in Safe Mode.
Though Driver Booster has been successfully uninstalled, you had better go to check if some of its components (e.g. preference settings, cache files, temporary folders and registry values) are left. To fully delete Driver Booster, proceed with the next steps:
Step 3. delete entries in registry
- Go to Start > Run, type "regedit" and hit Enter to launch Registry Editor.
- Click Yes if you are prompted to give confirmation in UAC dialog.
- Press Control + F together to open the Find box and then type Driver Booster.
- Hit Enter (and then F3) to locate the entries associated with Driver Booster.
- Right click on the keys or values and choose delete option in the list.
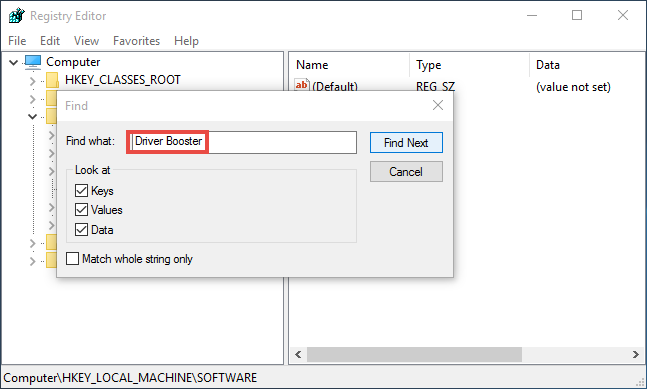
Notice: You must be very cautious when making changes on Windows Registry. Inexperienced users are not recommended to modify the registry without making a backup copy, cause serious issues may occur if you mistakenly delete keys or values there. If you are not confident in accomplish this part, we suggest you to utilize an professional uninstaller or a registry cleaner to get the job done automatically.
Step 4. remove leftovers in disk
- Head to Start > Control Panel > Folder Options, and then select the View tab.
- Check the "Show hidden files and folders" in Advanced settings and click OK.
- Click This PC on the desktop(or press Windows + E ) to open File Explorer.
- Type Driver Booster in the Search Bar and wait a few seconds.
- Identify Driver Booster leftovers in the result and delete them permanently.
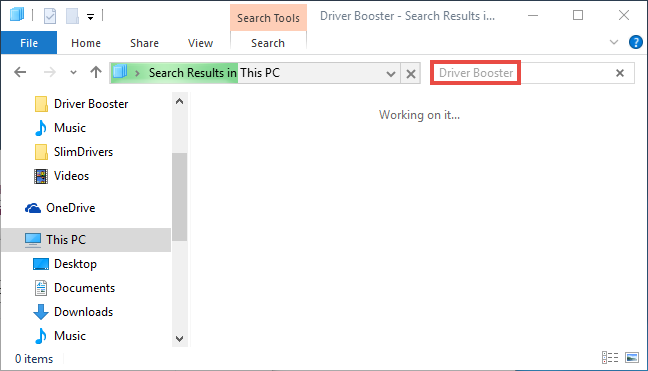
Congratulations! Now you should have fully remove Driver Booster from your system, and the conventional means is suitable for most Windows programs. Yet, if you are tired of those complicated steps and wanna get rid of Driver Booster as easily and thoroughly as possible, we strongly suggest you to take the method below.
Solution 2: Easily Remove Driver Booster without Hassle
(Strongly Recommended for All-Level Users)
Perhaps the conventional removal way is a little time-consuming and risk-taking for most ordinary users. Desired to uninstall Driver Booster with minimal effort? Try this pro uninstaller provided here. As lightweight but efficient removal tool designed for all level Windows users, Total Uninstaller is capable of scanning out all components of target program and removing them within a few click. Let’s see how it works:
1. Launch Total Uninstaller, choose Driver Booster and click Run Analysis.
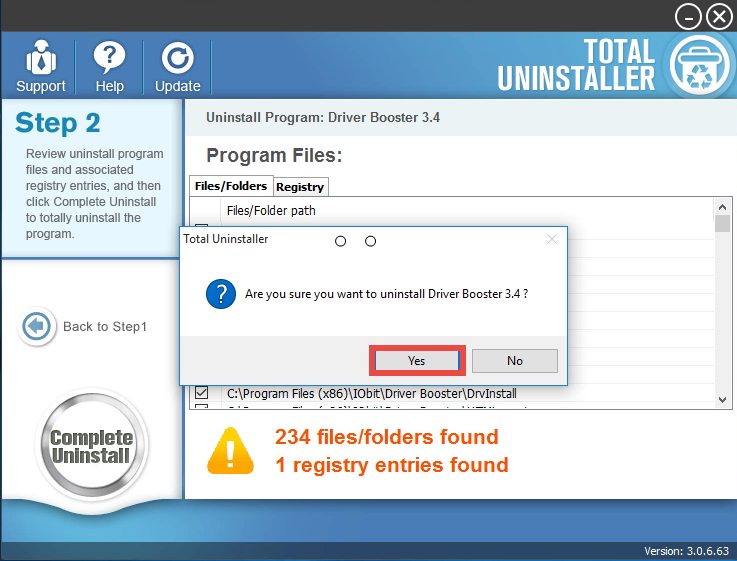
2. Click Complete Uninstall after all the components have been scanned out.
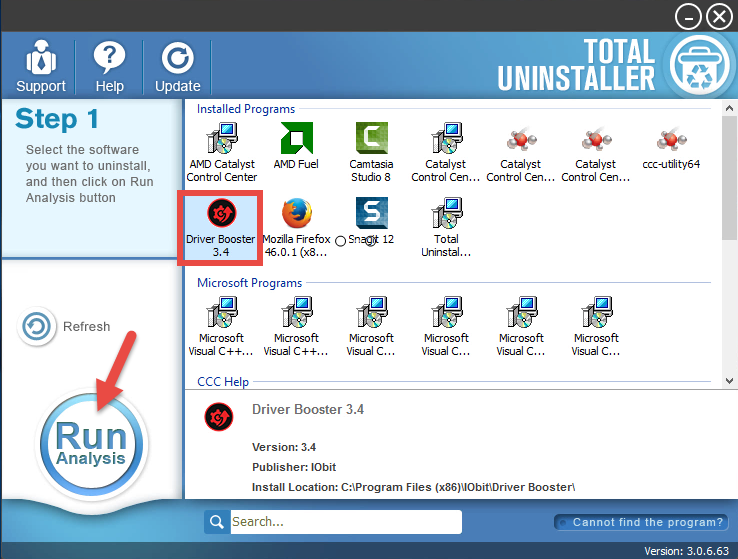
3. Click Yes in the pop-up dialog to confirm the uninstall of Driver Booster.
4. Follow the prompts in the Driver Booster wizard to finish the uninstall.
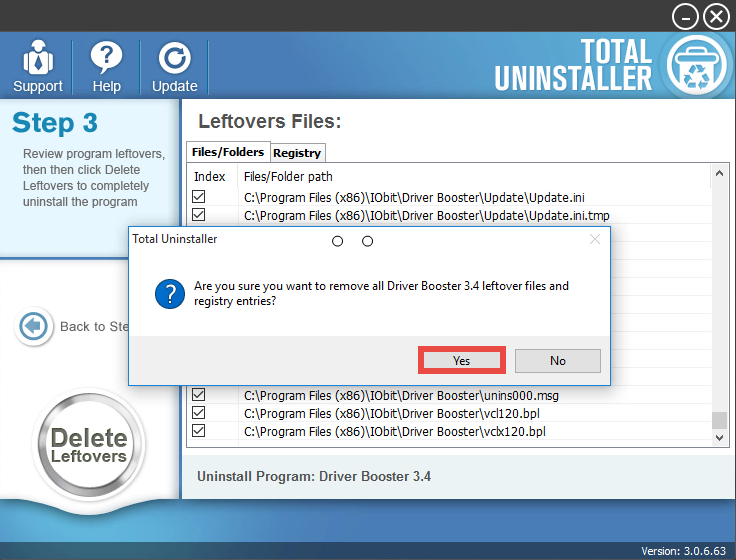
5. Click Scan Leftovers and then Delete Leftovers to perform complete removal.
6. Click Yes in the pop-up dialog and then OK to exit Driver Booster removal.
Video Tutorial - How to Remove Driver Booster Easily?
For the program that does not show up in the TU interface, you can perform a force uninstall to get rid of it. Here is the process: click Cannot find the program button in Step 1, specify the installation folder of target program in the pop-up window, and click Scan button to continue uninstallation with Step 3. Force Uninstall Mode can be used to effectively remove those corrupted/problematic/malicious/stubborn programs.
This article lists two effective solutions to help you uninstall Driver Booster. You can choose either of them to get rid of any unwanted program from your system. Anytime you encounter problems in PUP removal, welcome to contact our technical experts.


