Can’t Uninstall COMODO GeekBuddy? Get Help Here!

GeekBuddy is a online PC support service developed by Comodo Group. Windows users will get this program unintentionally when trying to install COMODO Antivirus. It may also be bundled with other free programs you download off of the Internet. Though GeekBuddy is not a malicious program, it can be regarded as a potentially unwanted program, especially for those who get it installed without their knowledge.
Problems users may encounter when try to uninstall GeekBuddy on Windows:
- GeekBuddy icon cannot be found in the list of installed programs.
- Windows built-in uninstall applet fail to start GeekBuddy uninstall.
- Uninstallation process has been interrupted or stopped for unknown error.
- GeekBuddy components are difficult to locate or cannot be deleted......

How to tackle with those issues and ensure the successful removal? You may have tried many times to uninstall GeekBuddy but end up with failure. In this post we’d like to introduce two approaches to help remove GeekBuddy from your PC. You can either run the all-in-one uninstall tool to perform the task effortlessly, or adopt the conventional means to manually get rid of GeekBuddy. It is all your choice.
Solution 1: Uninstall GeekBuddy Thoroughly & Effortlessly
Total Uninstaller is a lightweight but efficient uninstaller designed for all level Windows users. It takes three simple steps to fully uninstall any program from your computer. The intuitive and streamlined interface will guide you through the whole uninstall process. All you need to do is to click, click and click, and the job is done!
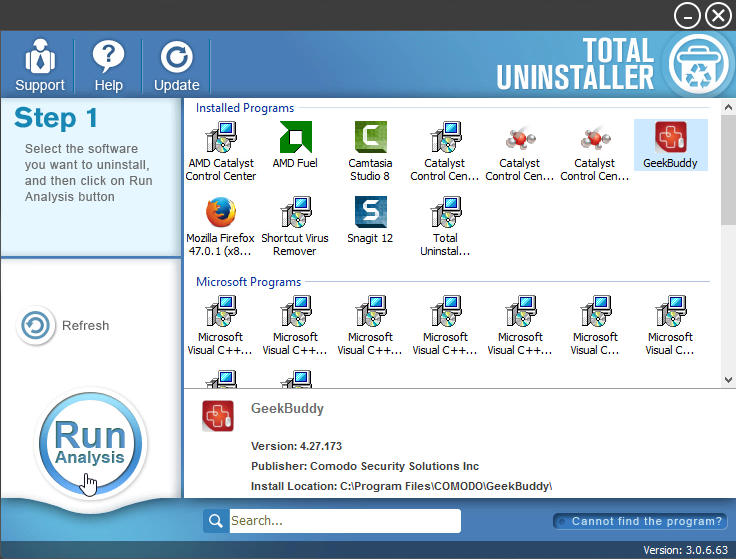
Step 1. select target program
- Completely shut down GeekBuddy, and then launch Total Uninstaller.
- Click GeekBuddy icon on the interface, and click Run Analysis button.
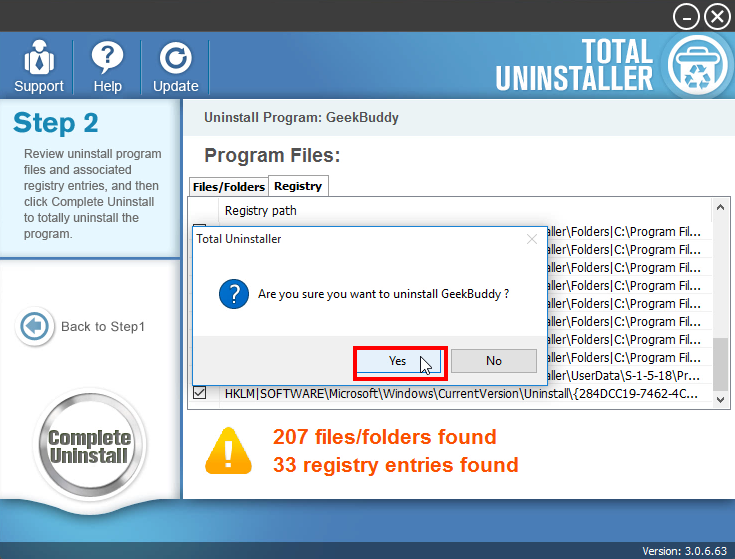
Step 2. perform the uninstall
- Click Complete Uninstall after all the components have been scanned out.
- Click Yes in the pop-up dialog, and then follow prompts in the uninstall wizard.
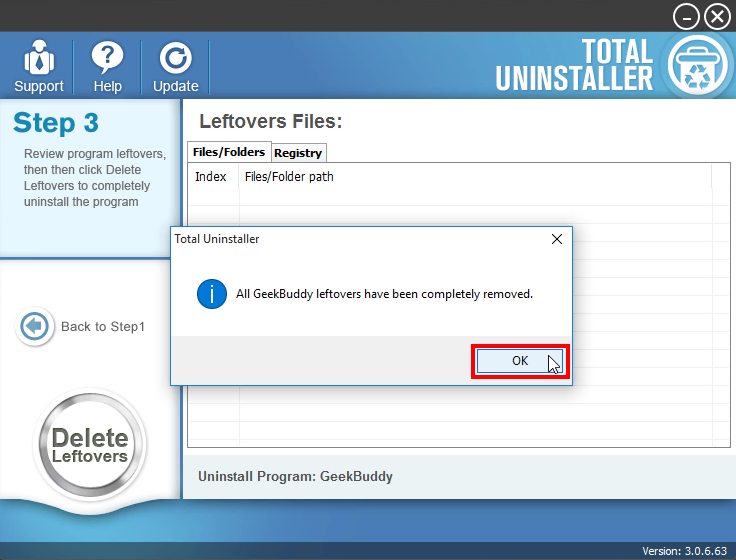
Step 3. clean out leftovers
- Click Scan Leftovers and then Delete Leftovers to perform thorough removal.
- Click Yes in the pop-up dialog and then OK to complete the uninstall process.
See? Uninstalling GeekBuddy by using a pro uninstaller can save you a lot of laborious work, and there is no need to worry about issues like incomplete uninstall. Total Uninstaller is capable of scanning out every piece of target program and forcibly removing any stubborn, corrupted,or malicious software - all in 3 simple steps.
Video Demonstration - how to uninstall GeekBuddy
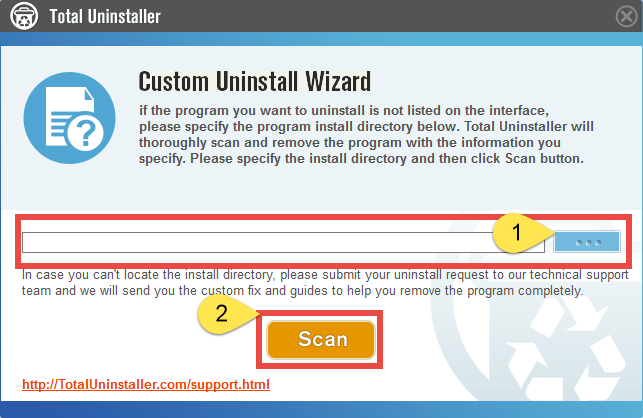
For the program that does not appear on the interface, you can launch the force uninstall mode to uninstall it. Here is how to do: click “Cannot find the program” button in Step 1, specify the install directory of target program, and click Scan button to continue the standard uninstall process. Force Uninstall Mode is especially designed to remove corrupted, problematic, malicious, or stubborn programs.
Solution 2: Manual Steps to Remove GeekBuddy on Windows
If you wanna uninstall GeekBuddy without using Total Uninstaller, you can adopt the conventional method, which means you need to manually uninstall the target program and then remove its residuals. Here are the detailed steps to get rid of GeekBuddy.
Step 1. Turn off GeekBuddy
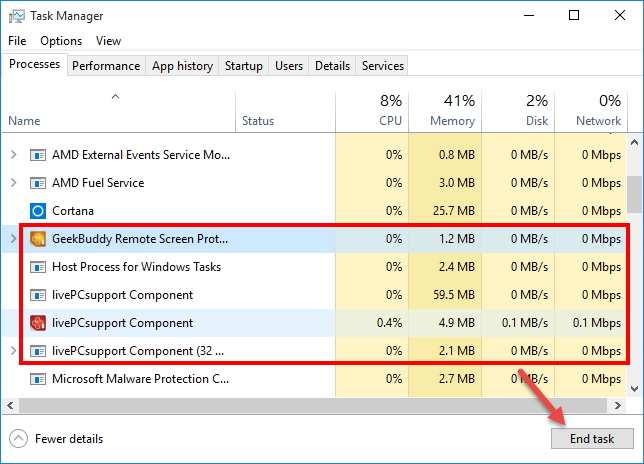
If GeekBuddy is running, you can deactivate the main executive program by right-clicking on its icon in the system tray and choosing Exit option. Yet, some of its processes may still run on the background even though the program has been shut down. So you will need to launch Task Manager to terminate those active processes.

- Right click the taskbar at the button and select Task Manager option.
- Select the processes related to GeekBuddy and then click End Task.
Step 2. Uninstall GeekBuddy
On Windows 7 :
- Click Start > Control Panel, and click Uninstall a program under Programs.
- Locate GeekBuddy, click the entry and then click Uninstall button.
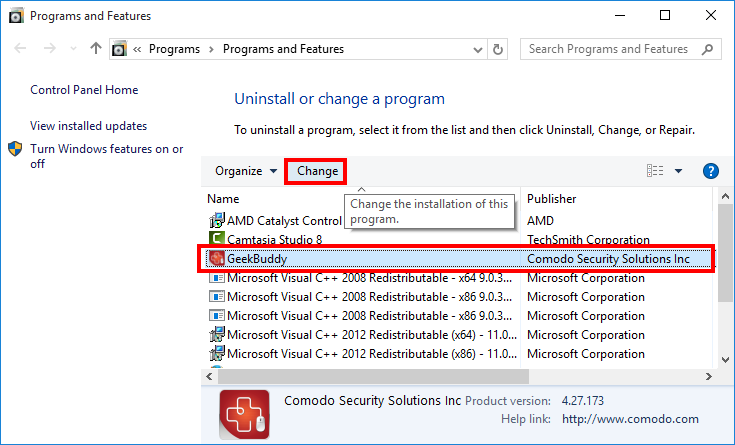
On Windows 8:
- Right click Start menu and select Programs & Features from the list.
- Locate and double click GeekBuddy to start the uninstall process.
On Windows 10:
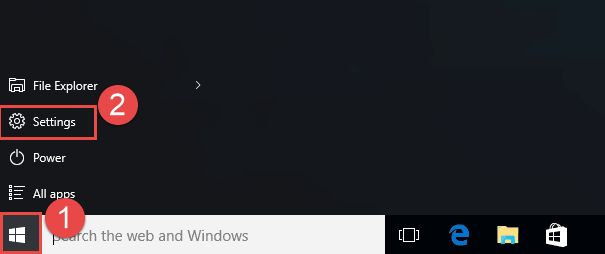
- Click Start menu > Settings, and click System in the Settings window.
- Click Apps & features to display all the apps installed on your system.
- Scroll down to click GeekBuddy, and click Uninstall next to it.
- Click Uninstall button again and then follow the onscreen instructions.
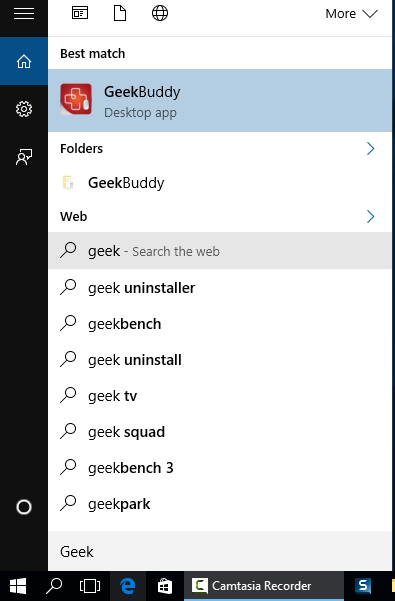
Windows 10 users can also type GeekBuddy in the Search box, and right click on this desktop app from the search result, and choose the Uninstall option from the list.
Tip: If GeekBuddy fails to complete the uninstallation for unknown reason, you can try to uninstall it after rebooting Windows into Safe Mode. If the app still cannot be uninstalled in Safe Mode, the reason may lie in the lack or corruption of some program executive files. In that situation, you will need to re-install GeekBuddy to cover missing/damaged files, and then perform the uninstall again in Safe Mode.
Step 3. Delete GeekBuddy leftovers
Can GeekBuddy be fully removed by the aforementioned steps?Well, the answer is No. Once installed, GeekBuddy will create files and folders hidden in Windows Registry as well as your hard disk. A standard uninstall sometimes will not help delete those files. If you don’t wipe them out, your system will be more and more cluttered.
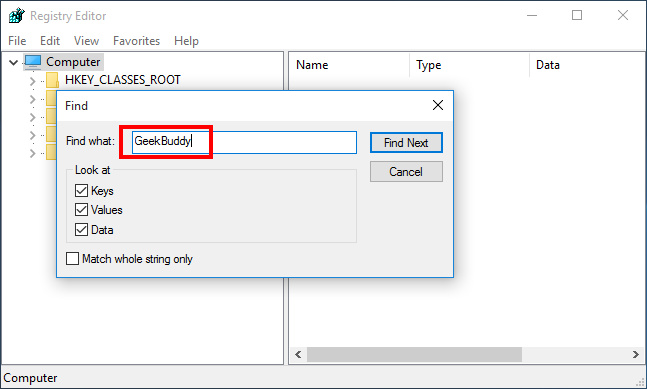
(1) Invalid keys/values in registry
- Go to Start > Run, type "regedit" and hit Enter to launch Registry Editor.
- Click Yes if you are prompted to give confirmation in UAC dialog.
- Press Control +F together to open the Find box and then type GeekBuddy.
- Hit Enter (and then F3) to locate the entries associated with GeekBuddy.
- Right click on the keys or values and choose delete option in the list.
Notice: We only recommend advanced computer users to manually delete GeekBuddy leftovers in Windows Registry. Any improper modification may result in severe problem or even system crash. Always backup your registry before making any change there. Also, you can use a registry cleaner instead to save troubles.
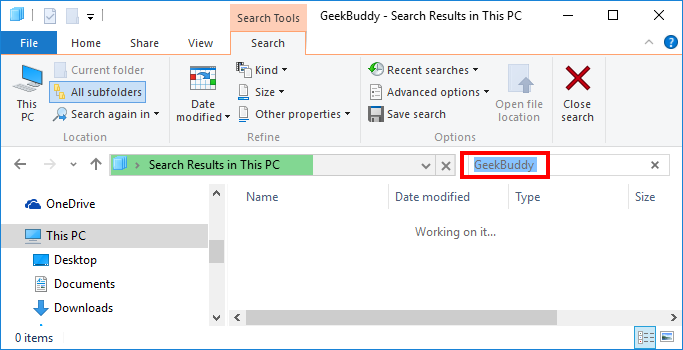
(2) Junk files/folders in hard disk
- Head to Start > Control Panel > Folder Options, and then select the View tab.
- Check the "Show hidden files and folders" in Advanced settings and click OK.
- Click This PC on the desktop (or press Windows + E ) to open File Explorer.
- Type GeekBuddy in the Search Bar and wait a few seconds.
- Identify GeekBuddy leftovers in the result and delete them permanently.
Finally the uninstallation come to an end. After going through all these manual steps you should have successfully removed GeekBuddy. Felt troublesome and time-wasting to conduct a manual removal? If you want to get rid of all these troubles in uninstalling unwanted programs, why not give Total Uninstall a try? Featured by ease of use & efficiency, it offers the easiest and quickest uninstall solution ever.
Is this article helpful for you? Share your thoughts on the comment section below.