How to Completely Uninstall Rising Antivirus (Windows 7)
Fail to uninstall Rising Antivirus from your PC? Have no clue how you can get rid of all its traces like it’s never installed before? This uninstall tutorial will help you out.
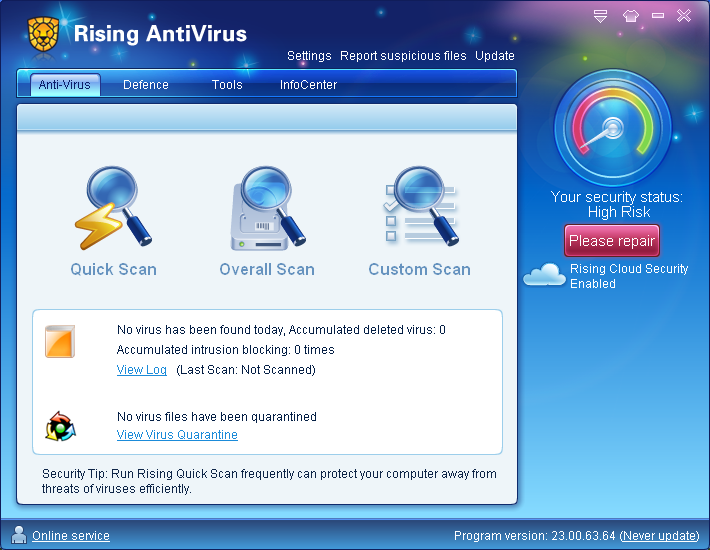
Rising Antivirus is a free antivirus that claims to offer comprehensive protection against viruses, worms, Trojans, rootkits and other online threats. Yet, this antivirus has not updated for a quite long time, and the latest version still only supports older versions of Windows operating system (Windows 7, XP, Vista and 2003). Here are some common problems associated to Rising Antivirus that users may encounter:
- Haven’t installed Rising Antivirus but its option appears in the right-click menu.
- Try to upgrade to Windows 10 but system prompts to uninstall Rising Antivirus.
- Control Panel does not offer Uninstall option when Rising Antivirus is selected.
- Uninstall process fails to complete due to error message or unknown reason.
- Cannot fully detect or effectively get rid of Rising Antivirus traces from system.

Different users may come across different issues during the uninstall. Whatever problem you run into, you will get the right way in this tutorial. Two effective methods are provided below to help you uninstall Rising Antivirus perfectly.
Standard Approach to Uninstall Rising Antivirus (Manually)
If you want to uninstall Rising Antivirus by your own, then adopt the conventional way to get rid of all its components. Here are the uninstall steps for Windows 7 users.
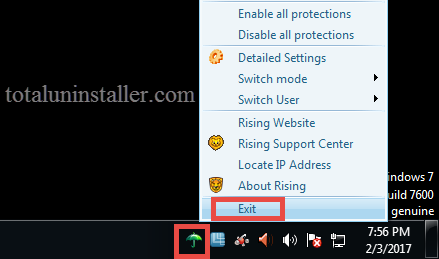
Step 1: Turn off Rising Antivirus
If Rising Antivirus appears in the system tray, you should shut it down completely prior to the uninstall. To do so, right click on its icon and choose Exit option. You will be required to type the verification code to shut down the main executive program.
And to verify if its related process still runs on the background, do the followings:
- Right click on the taskbar and then choose Task Manager to launch this utility.
- Select process(es) pertaining to Rising Antivirus, and click End Task button.
If necessary, you can directly boot Windows into Safe Mode to perform the uninstall.
Step 2: Uninstall Rising Antivirus
Once installed properly, programs can be uninstalled from Windows built-in uninstall applet. Make sure to log in as an administrator, otherwise error message may pop up.
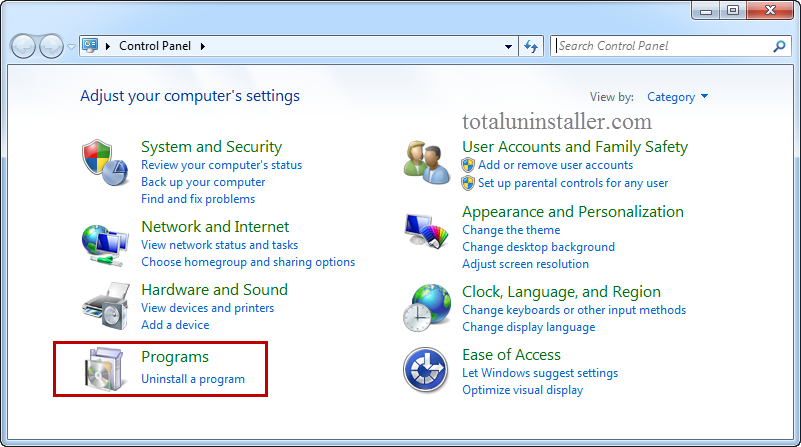
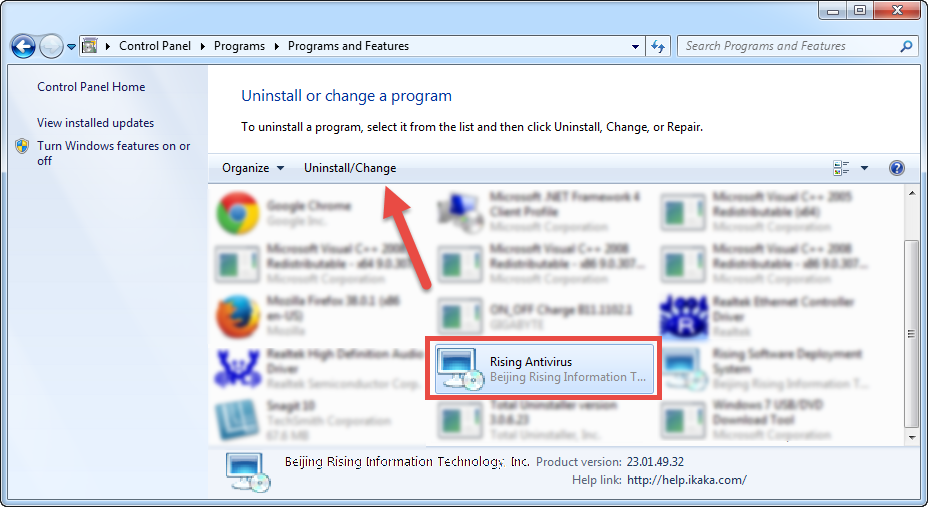
- Head to Start > Control Panel > Programs, and click the Uninstall programs link.
- Scroll through to select Rising Antivirus from the list, and click Uninstall button.
As the Rising Maintenance window pops up, follow the instructions as shown.
- Make sure to choose Uninstall option, and click on Next to start the uninstall.

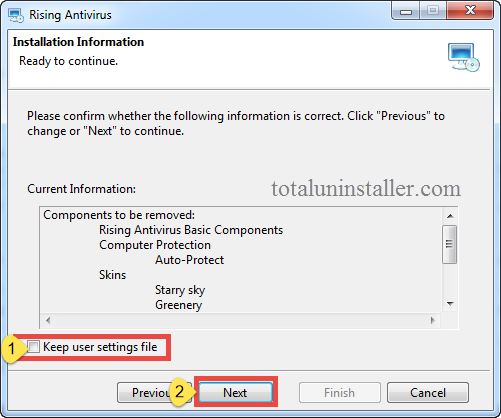
- Check the box saying Keep user settings file, and click on Next button.
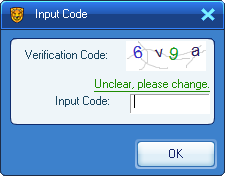
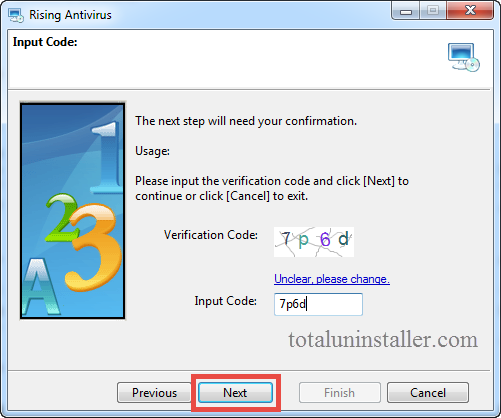
- Type the verification code again in the box, and click on Next button.
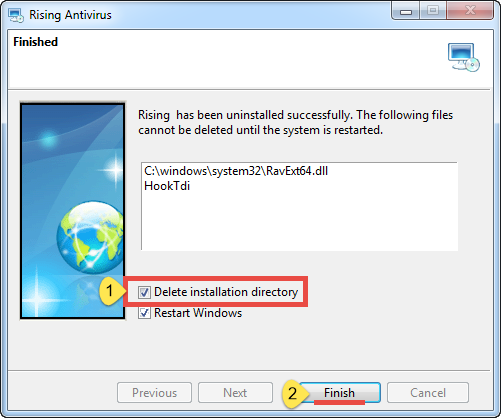
- Check the box saying Delete installation directory, and click Finish button.
Now your computer will restart and Rising Antivirus disappear from Control Panel.
Tip: If Rising Antivirus has been corrupted, or some of its main executive files are missing, you may fail to uninstall it by this way. In that case, you can re-install Rising Antivirus to cover those problematic files, and then uninstall it in the Safe Mode.
Step 3: Delete Associated Leftovers
Though Rising Antivirus has been removed from the list of installed programs, some of its components, like registry entries, invalid shortcut or installation folder, still linger around your system. To entirely get rid of Rising Antivirus, you are supposed to search for and delete those traces in the whole system. So proceed with that:
1) Keys & values in registry
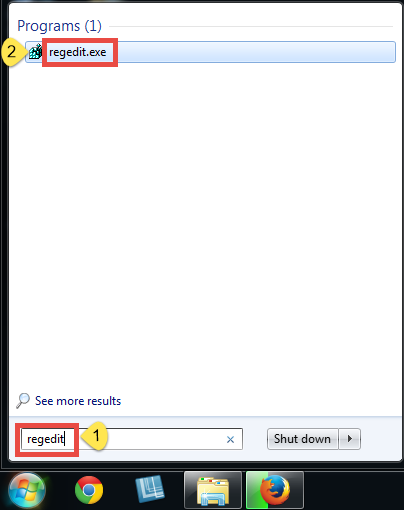
- Go to Start > Run, type "regedit" and hit Enter to launch Registry Editor.
- Click Yes if you are prompted to give confirmation in UAC dialog.
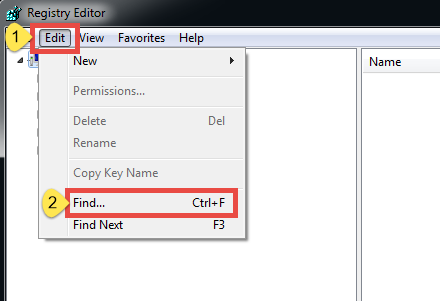
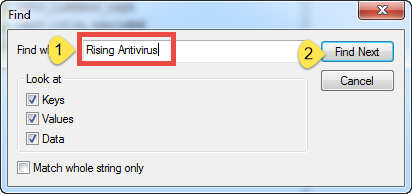
- Click the Find from Edit menu, type Rising Antivirus in the Find box, and then hit Enter key to start searching matched items in Registry.
- Once found, right click on the key or value and choose delete option from the list.
- Hit F3 to locate the next entry associated with Rising Antivirus.
Note: Be truly careful when you make changes on Windows Registry. Serious problems may be triggered if you make any misoperation there. You had better to delete the entries after making a backup copy of the registry. We highly suggest you to utilize an professional uninstaller or a registry cleaner to handle this task painlessly.
2) Files & folders in hard drive
- Head to Start > Control Panel > Folder Options, and then select the View tab.
- Check the "Show hidden files and folders" in Advanced settings and click OK.
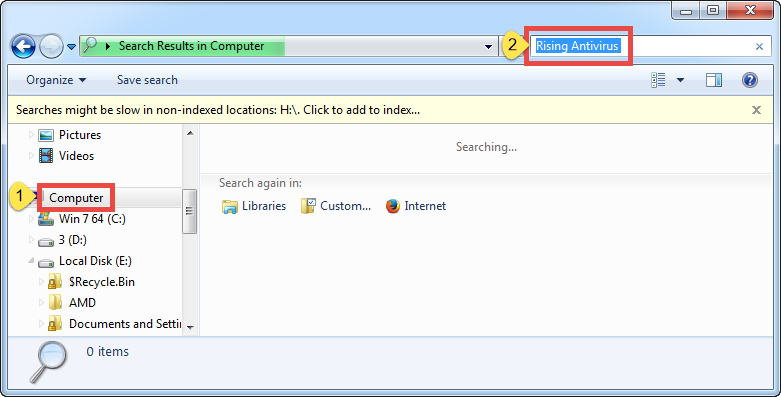
- Click This PC on the desktop (or press Windows + E ) to open File Explorer.
- Type Rising Antivirus in the Search Bar, and wait for the scanning result.
- Identify and delete Rising Antivirus components in the search result.
That’s the process you will go through to fully uninstall Rising Antivirus, and then you can continue uninstalling the associated program - Rising Software Deployment System.
One-Click Solution to Remove Rising Antivirus (Recommended)
Still fail to uninstall Rising Antivirus manually? Tired of performing complicated steps in the aforementioned method? If you value time much or lack adequate skills in program removal, we highly suggest you to use an all-in-one tool to uninstall any unwanted programs. Total Uninstaller is a handy utility featured with powerful uninstall engine and intuitive operating procedure. Here are what you need to do:
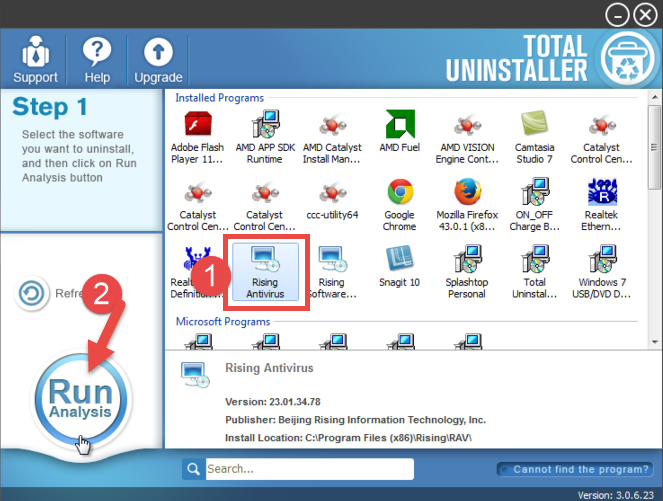
- Launch Total Uninstaller after totally deactivating Rising Antivirus.
- Click on Rising Antivirus, and click Run Analysis to scan this program.
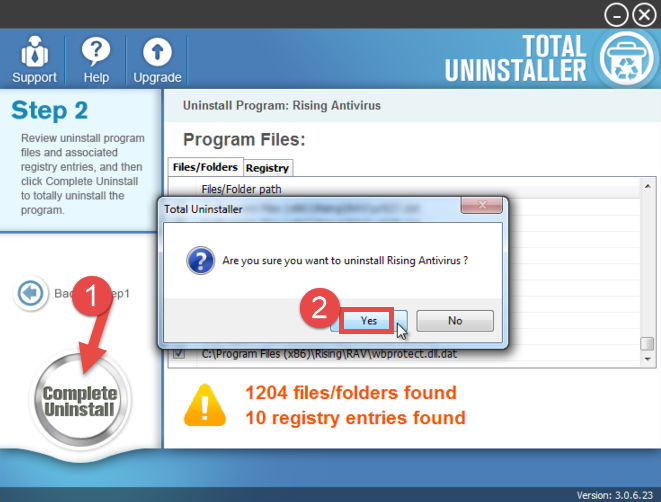
- Click on Complete Uninstall after all the components have been scanned out.
- Click Yes in the dialog and follow on-screen prompts to complete the uninstall.
When the uninstallation is complete, you can choose to restart PC, then re-launch Total Uninstall and click on the Review all the leftovers to delete its traces.
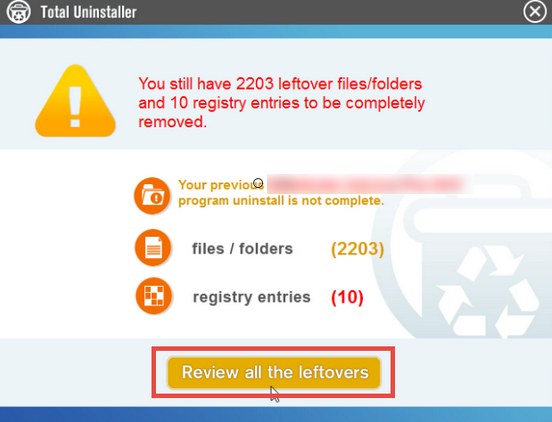
Or you can uncheck the box that says Restart Windows, and proceed with the Step 3.
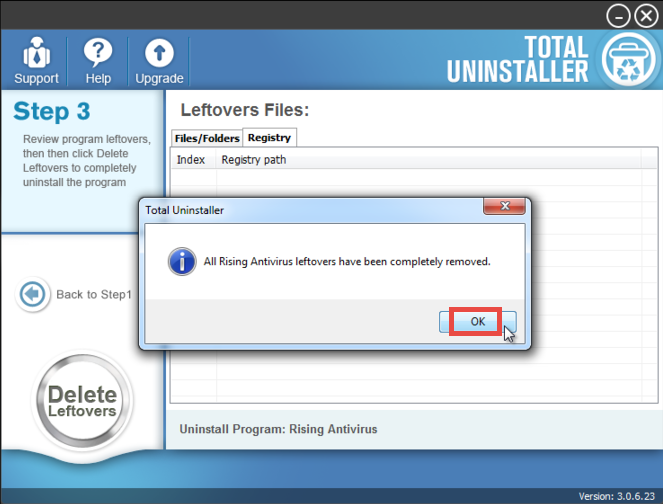
- Click on Scan Leftovers and then Delete Leftovers to perform complete removal.
- Click Yes to confirm and then OK. Then close Total Uninstaller and restart your PC.
Force Uninstall Mode: for the program that does not show up in the interface, you can perform a force uninstall by doing these: click “Cannot find the program” button in Step 1, specify the installation folder of target program in the pop-up window, and click Scan button to continue normal uninstallation. This mode is especially designed to remove corrupted/problematic/malicious programs or files forcefully.
Video Tutorial - How to Uninstall Rising Antivirus within Clicks
To summarize, this tutorial offers optional approaches to help you uninstall Rising Antivirus. Which one is your preferred? Welcome to share your thoughts with us.
If you run into any uninstall issues, feel free to contact Total Uninstaller team for help, and we will do our best to assist you in uninstalling unwanted programs.