Uninstall Autorun Eater on Windows in the Simplest Way

What is Autorun Eater & should I remove it?
Autorun Eater is a freeware developed by Old McDonald's Farm to automatically monitor and remove suspicious "autorun.inf" files in your system and external drives. Many software download websites say it is safe to install and use this program, however some antivirus software (like Trend Micro) will prevent Autorun Eater from running and identify files it installed as malware. If you have tested this program and found it is not satisfying as you expected, you might need to uninstall Autorun Eater from your PC.
What problems will be triggered during the uninstall?
- Control Panel fails to bring up Autorun Eater uninstall wizard;
- Autorun Eater has been corrupted and cannot be uninstalled normally;
- It still runs on the background after you perform a standard uninstallation;
- Some of its components remain on system drive and you fail to delete them.....

To help you effectively uninstall Autorun Eater, we provide two different methods in details. First of all, try to get rid of Autorun Eater from your PC in the simplest way.
Simple Steps to Fully Uninstall Autorun Eater
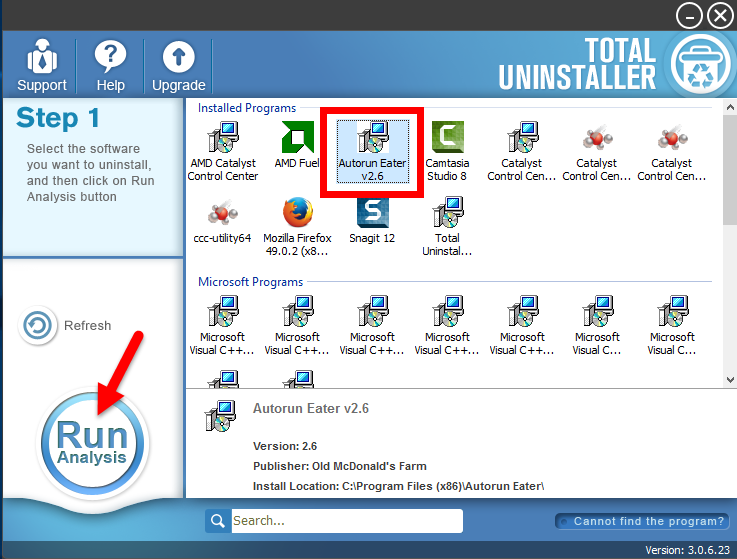
It is a preferred way to uninstall Autorun Eater utilizing a professional tool. Total Uninstaller is specially designed for both novice and experienced users to easily remove any unwanted, problematic, malicious program on Windows.Wanna remove Autorun Eater effortlessly? You just need to take 3 simple steps (select > uninstall > confirm). Here’s how you can quickly uninstall Autorun Eater with Total Uninstaller:
- Deactivate Autorun Eater completely, and then launch Total Uninstaller.
- Click on Autorun Eater icon, and click the Run Analysis button to proceed.
- Click Complete Uninstall after all the components have been scanned out.
- Click Yes in the pop-up dialog and follow prompts to complete the uninstall.
- Click Scan Leftovers and then Delete Leftovers to perform thorough removal.
- Click Yes to confirm the request, and then click OK when the deletion is finished.
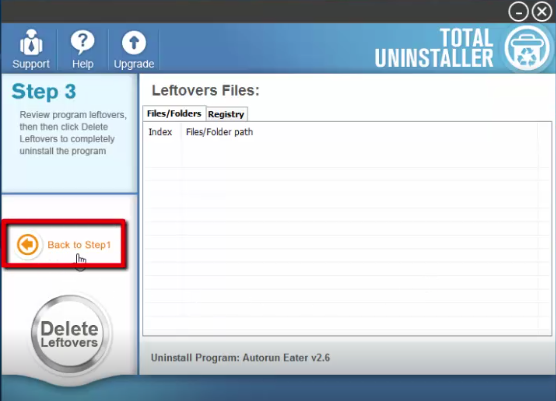
After that, click on the “Back to Step 1” button so that Total Uninstaller will scan your PC again and list current installed programs. Now you can see that Autorun Eater has disappeared from the interface, and surely it has successfully gone from your system.
[Video Tutorial - How to Uninstall Autorun Eater]
For the program that does not show up in the TU interface, you can perform a force uninstall to get rid of it. Force Uninstall Mode: click on the “Cannot find the program” button in Step 1, specify the installation folder of target program, and click Scan button to continue uninstallation with Step 3. The force uninstall option can be applied to deal with corrupted/problematic/malicious/stubborn programs effectively.
Conventional Means to Manually Remove Autorun Eater
Desired to uninstall Autorun Eater without using Total Uninstaller? Here we provide the conventional method to guide you manually delete this program and its leftovers.
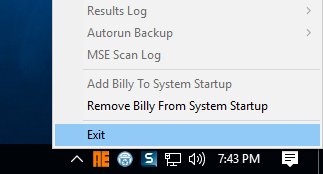
If Autorun Eater runs on the background, you should totally shut it down prior to the uninstall. To do so, right click its icon in system tray and choose Exit from the menu.
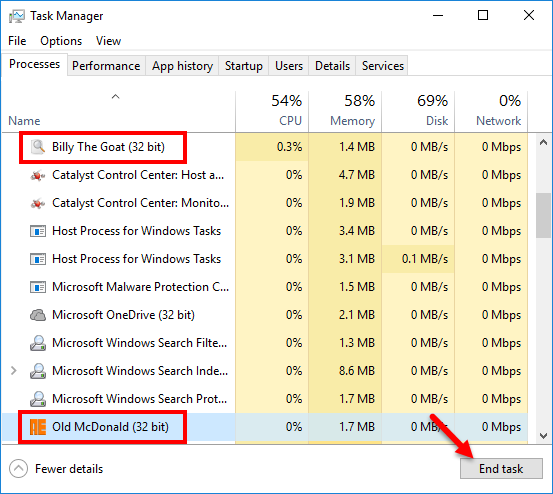
Meanwhile, you can launch Task Manager to detect and exit its active processes.
- Right click the taskbar at the button and select Task Manager option.
- Select the process(es) pertaining to Autorun Eater and then click End Task.
Removal Section 1: Uninstall Autorun Eater
Once a program is installed properly, you can easily uninstall it through the Control Panel. For different Windows OS users, the uninstall operations are slightly different.
On Windows 7 :
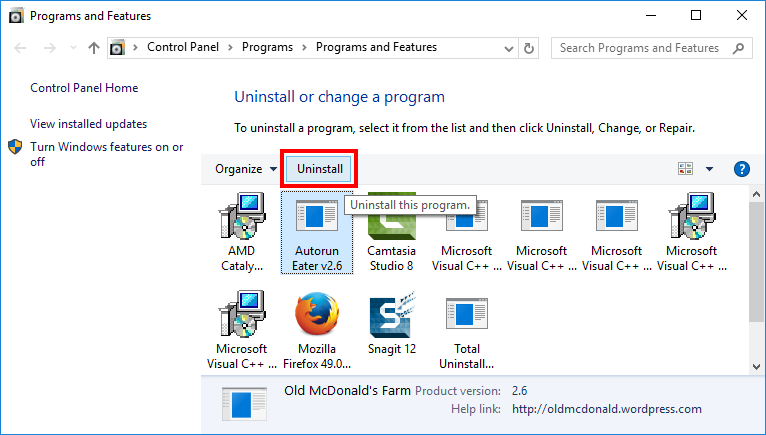
- Access Control Panel from Start menu, and click Program in the Control Panel.
- Scroll through to select Autorun Eater, and then click Uninstall button.
On Windows 8/10:
- Right click Start icon and select Programs and Features from the list.
- Locate Autorun Eater, and double click on it to start the uninstall.
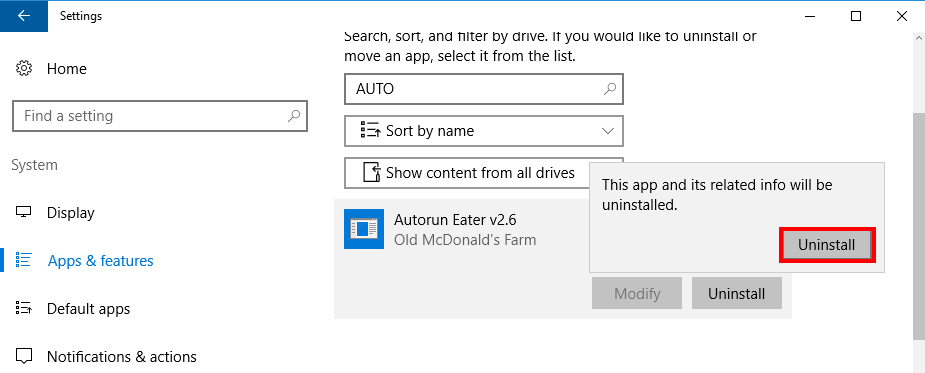
Besides, Windows 10 also provides another option to uninstall installed programs:
- Head to the Start menu > Settings to open the Settings app.
- Select Apps & Features from the left hand to list installed programs.
- Select Autorun Eater from the right hand list, and click on Uninstall twice.
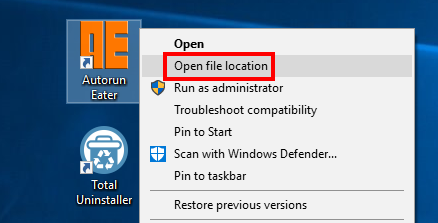
Some kinds of programs come with their own dedicated uninstall program. To verify that, you can right click on the Autorun Eater shortcut, choose Open File Location and then navigate to the installation folder. In our test, the executive file named unins000 is identified as its default uninstaller, which means, you can double click to run this file, and then follow the on-screen instructions to complete the uninstallation.

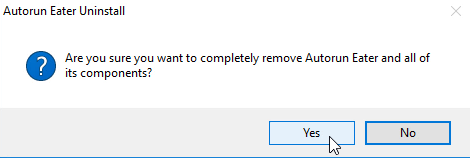
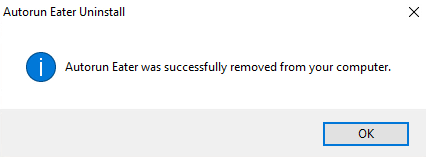
- Click Yes button in the Autorun Eater Uninstall wizard that pops up.
- Once the uninstall is complete, click OK button to close the wizard.
Uninstall Tip: What if Autorun Eater cannot be uninstalled by these manual steps? That might happen when the program has been corrupted, or when some executive files are missing. If so, try to re-install Autorun Eater to cover corrupted/missing files, and then uninstall Autorun Eater in Safe Mode. See: How to enter into Safe Mode?
Removal Section 2. Delete Associated Residuals
You may have found that simply uninstalling Autorun Eater by the standard steps won’t help you get rid of all its traces, as those invalid files or folders still remain around your system. That’s why some users get alerts and pop-ups even though Autorun Eater has been removed from the list of installed programs. To fully remove Autorun Eater, follow the extra steps to delete invalid, junk program components.
(1) Invalid keys/values in registry
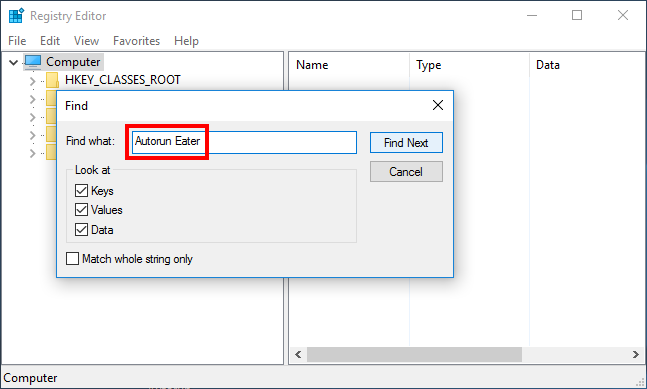
- Go to Start > Run, type "regedit" and hit Enter to launch Registry Editor.
- Click Yes if you are prompted to give confirmation in UAC dialog.
- Press Control + F together to open Find box, and then type Autorun Eater.
- Hit Enter (and then F3) to locate the entries associated with Autorun Eater.
- Right click on the keys or values and choose delete option in the list.
Warning: Misusing the Registry Editor can render your system unstable or even inoperable. For added protection, back up the registry before you modify it. Then, you can restore the registry if a problem occurs. If you wanna keep your Registry organized & clean without taking any risk, try Total Uninstaller to get the job done.
(2) Junk files/folders in hard disk
Head to Start > Control Panel > Folder Options, and then select the View tab.
Check the "Show hidden files and folders" in Advanced settings and click OK.
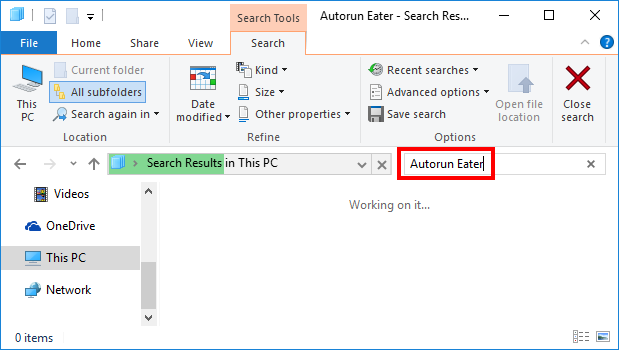
Click This PC on the desktop (or press Windows + E ) to open File Explorer.
Type Autorun Eater in the Search Bar and wait a few seconds.
Identify Autorun Eater leftovers in the result and delete them permanently.
After all these steps you should have thoroughly removed Autorun Eater on your PC.
Average & experienced users can take the manual solution to fully uninstall Autorun Eater, but the whole process can be quite time-consuming & risk-taking. If you need to uninstall programs frequently, a truthworthy and efficient uninstaller will be a better choice to get rid of programs effortlessly, especially when you are dealing with stubborn, problematic and malicious software. Give Total Uninstaller a try now!