Fast Way to Uninstall CPU-Z Program from Windows OS
Want to find a fast and effective way to uninstall CPU-Z? This post will provide the available and the best approach for you to clear this application thoroughly from the computer.

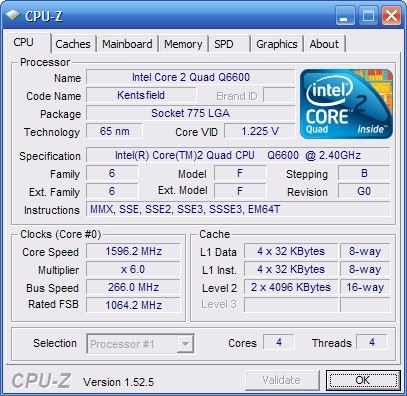
What is CPU-Z?
CPU-Z app is a freeware that can gather the basic information and profile of the Windows system, including the RAM, central processing unit, motherboard chipset, and other main devices' features. It is developed by CPUID, and the default installation folder on computer is "C:\Program Files\CPUID\CPU-Z\"
Associated install files and configurations of CPU-Z:
- cpuz.exe
- cpuzc.ini
- cpuz_eula.txt
- cpuz_readme.txt
- unins000.dat
- unins000.exe
When the program is coming to a computer, many configurations and data will also be created and located on the associated folders, when it turns to uninstall CPU-Z, you should take out all of these things and content from the PC. And here, we will introduce three ways which are all available to remove the program, and you can choose the most effective way you think to perform the removal on your own PC.
Removing methods to uninstall CPU-Z on PC
Uninstall it with the removing feature in Window's Control Panel
According to many people's experiences of removing programs from PC, they have already been very familiar with the Windows' removing feature which located in the Control Panel, so maybe I don't need to introduce too much about this feature, and now, let's see how can take this way to manually remove CPU-Z from the computer.
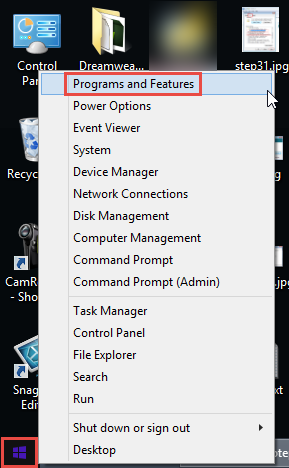
- Right-click on the Windows button, select Programs and Features
(If you cannot find the item, try this way: click to open Control Panel on Start menu, and click the uninstall feature in Control Panel)
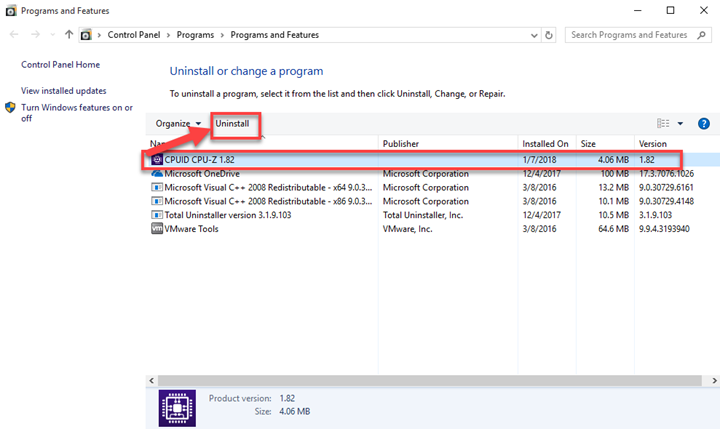
- Find CPU-Z on the list, and highlight it
- Click on the Uninstall to start the removal
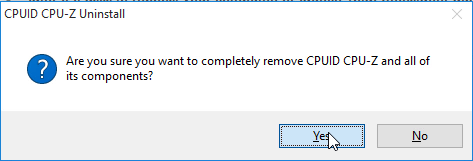
- Click on Yes to make sure you need to completely remove the program
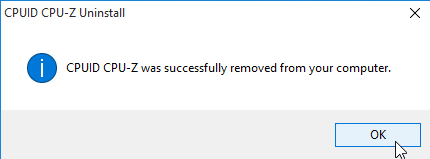
- Click OK when the removing process finished, close all of windows and restart the computer
- Go to activate the computer's search box when log-in the computer
- Type "regedit" in the box, and open the Registry Editor on your system
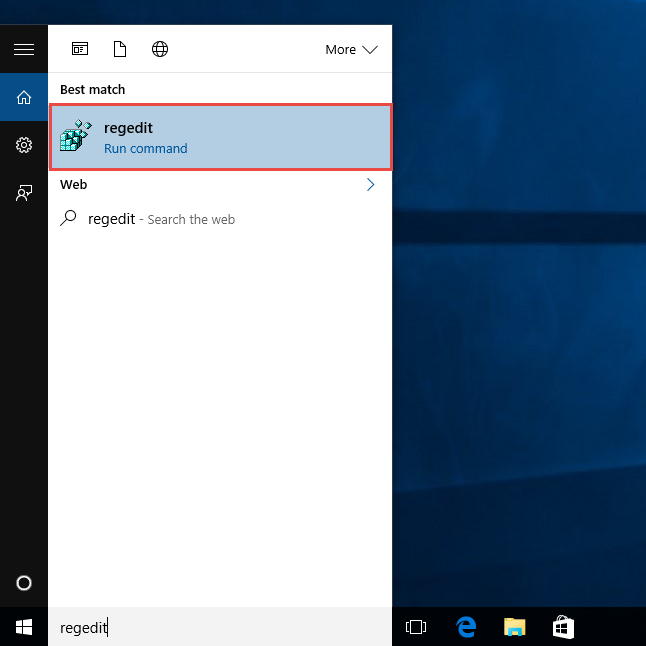
- Expand the groups of registry keys inside, and delete the one which is belonging to the CPU-Z application (if you are afraid of deleting the wrong file, you can export the specific file for back-up)
- Close the Editor when you finish
Remove CPU-Z with its own uninstall feature
Alternatively, you can choose another manual way to get rid of CPU-Z, which is taking its specific uninstall process in its installation folder.
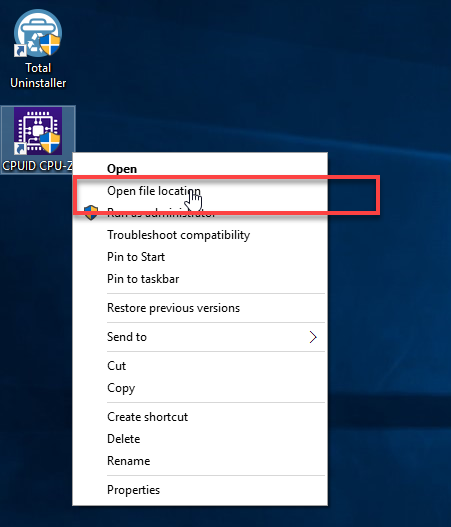
- Go to the desktop of your computer, and right-click on the shortcut of CPU-Z
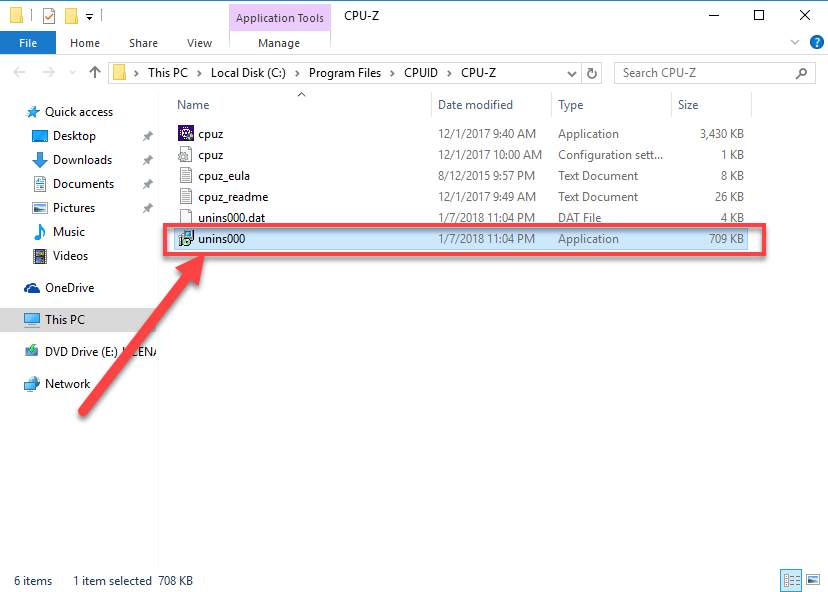
- Select Open file location, and browser the list of its installed files until you find the uninstall process inside
- Double-click on the uninstall executable file, and click OK to confirm and start the removal
- Click on Yes to start the removal
- When finish, you should go to restart your Windows system
- Like the method one, you should open the Registry Editor and delete CPU-Z's registry keys (note: this is a risky step and don't delete the wrong registry, which may cause serious system issues)
Like the above manual removing way, taking this approach to uninstall CPU-Z also leave a leftovers issue on the computer, so, after finishing the app uninstallation, please remember to take additional cleaning job to erase all of its vestiges on the PC.
Uninstall CPU-Z with an effective app removal utility
For people who want a faster and easier way to uninstall CPU-Z, especially avoid the long and annoying manual deleting steps, it is suggested to apply an advanced app uninstaller like Total Uninstaller to remove CPU-Z as well as other apps you want to remove from the computer. Take a look at the following removing steps, you will find that CPU-Z can be removed thoroughly and quickly from the PC.
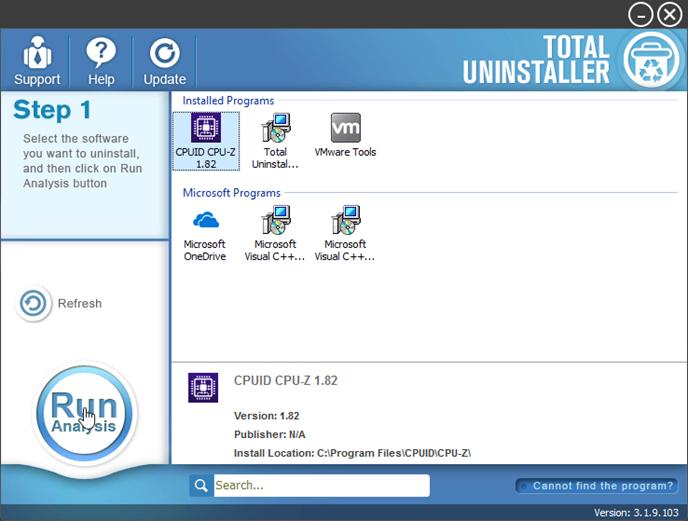
- Launch Total Uninstaller on the computer, and locate CPU-Z's icon on the menu
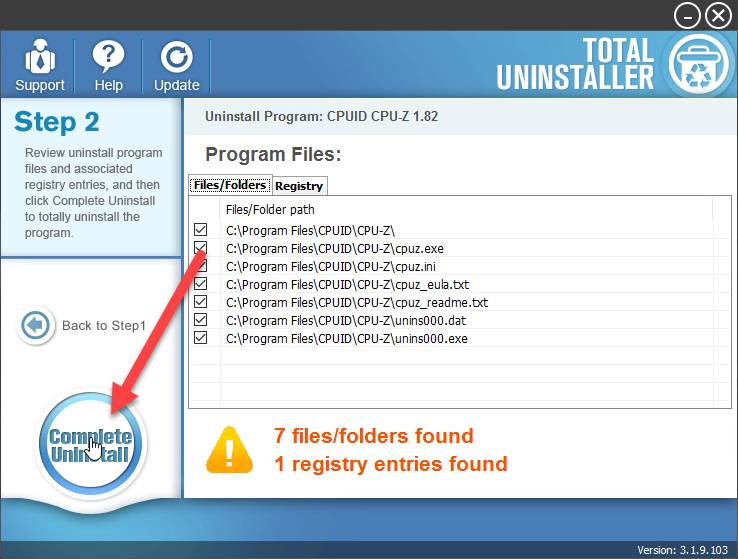
- Click on "Run Analysis", and then click on Complete Uninstall to start the removal
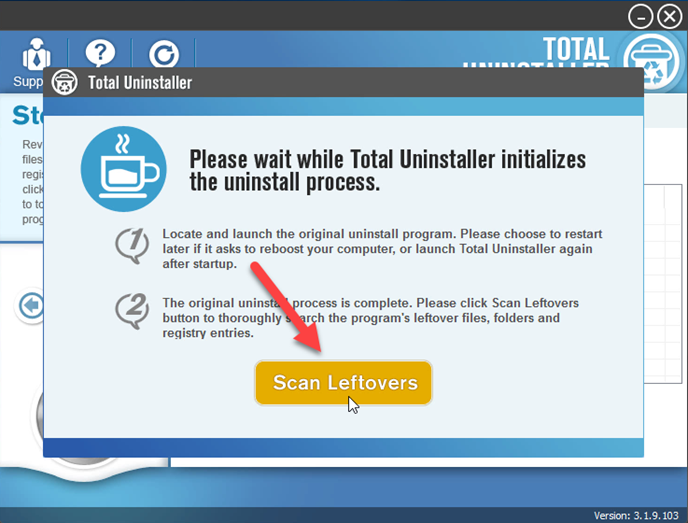
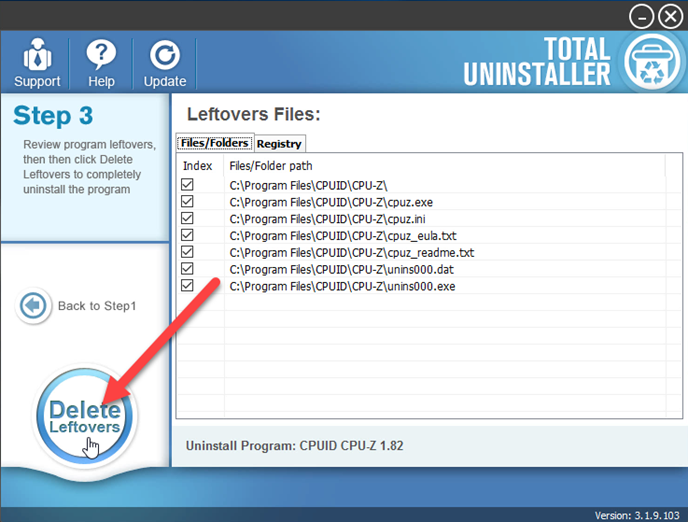
- Finish the first stage removal with instructions, and then click on Scan Leftovers
- Click on Delete Leftovers to clean all of vestiges on your computer
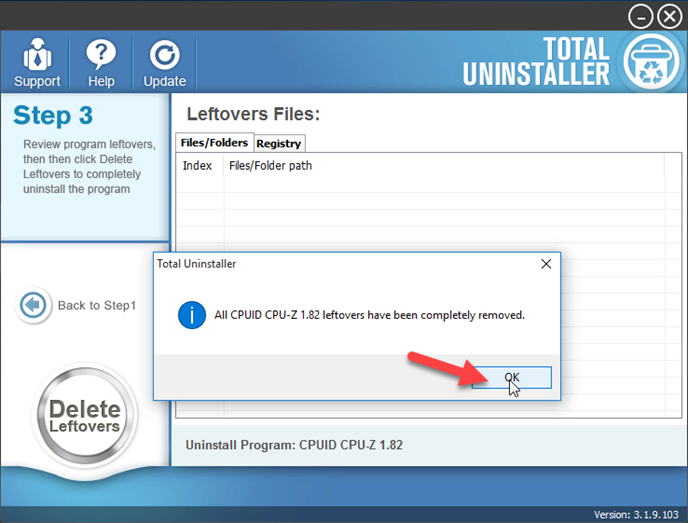
- Exit the uninstaller, and restart the computer to completely uninstall CPU-Z on your PC.
If you need more specific information or support about the program, you can contact the CPU-Z support team to troubleshoot the problem on your computer.
Get Total Uninstaller to uninstall CPU-Z: