How to Uninstall IDrive from Windows PC?
Have you been in such situations?
- Having made several tries, I have been unable to Uninstall IDrive and remove its leftovers.
- The Windows built-in uninstaller is not working. It says it has removed stuff related to IDrive, but it hasn't been removed. I tried restarting my computer to see if that would make a difference. It still didn't work.
- When trying to uninstall the IDrive software using Windows built in app uninstaller, it informs Windows can't find 'C:\Program Files\IDrive\Uninstall.exe'. Make sure you typed the name correctly, and then try again. The reason why I find a solution online is because Windows built in uninstaller didn't work. I feel really overwhelmed.
- After uninstalling with Windows built-in uninstaller, the software informed me that leftovers have been not removed. What was supposedly removed is still there. How to clean out IDrive leftovers completely?
- I have been attempting to uninstall IDrive for some time. It really is most frustrating, please help.
- I am unable to uninstall leftover registry items from IDrive. I uninstalled the program, but not everything was removed. Can you help?
If so...
If you are unable to uninstall IDrive and facing some troubles similar to the situations mentioned above, we can help and get a solution for you here. We will detail every step you need to do to remove any unwanted programs from your Windows computers. Besides that, we will introduce a professional uninstaller tool to help clean out all leftovers of IDrive thoroughly and automatically.
At here, you can click the download button to use the professional uninstaller tool named Total Uninstaller to remove IDrive in no time.

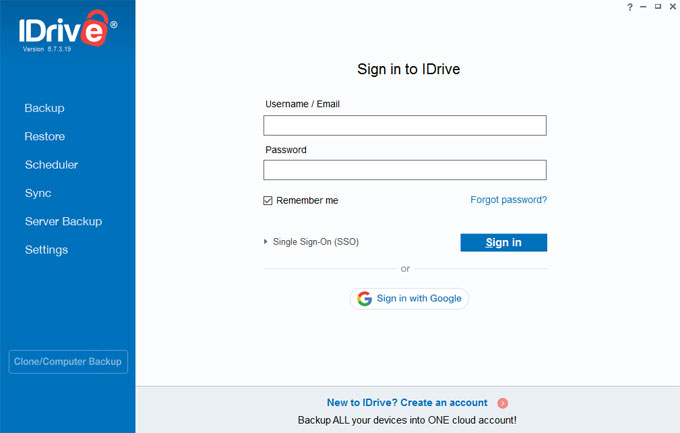
IDrive Overview
IDrive is an all-in-one and feature-rich software that delivers great backup service for Windows PCs, Mac computers, iPhones, iPads, Android devices and more. IDrive is capable of backing up, storing and securing all your data for business computers, servers, and other devices. IDrive also is a powerful cloud back up software that can protect against ransomware. All of data will be encrypted with a private key so that users can be assured rest. Besides that, IDrive is a right start for those users who need to backup multiple devices into a single account. IDrive will make all data, files, and folders syncronized across all devices.
How to Uninstall IDrive from Windows?
We will show you how to remove IDrive in two different methods, one is manual way and the other one will use a technical and automatic uninstaller tool.
Method 1: Remove IDrive in Manual Ways
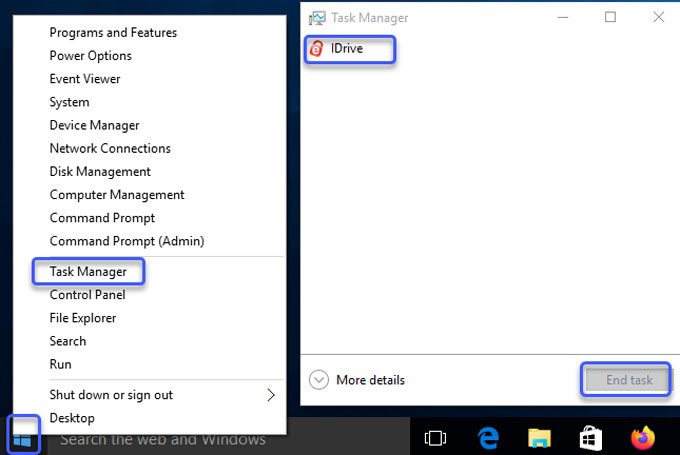
Step 1: Close all process or tasks related to IDrive in Task Manager.
Right-click the Start menu > click Task Manager > click IDrive > click End task or End process.
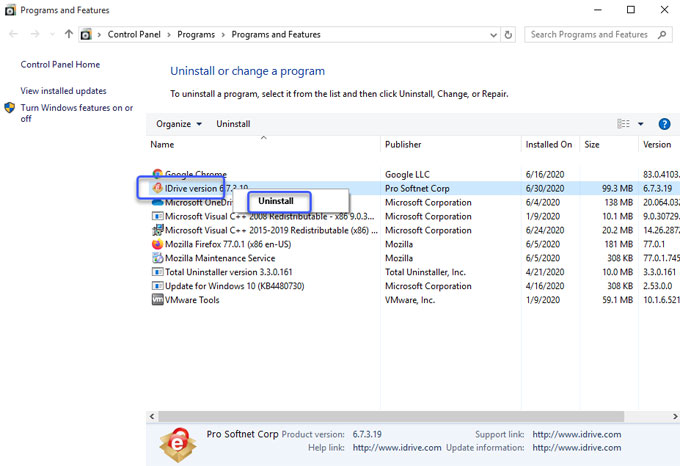
Step 2: Open Control Panel > click Uninstall a program.
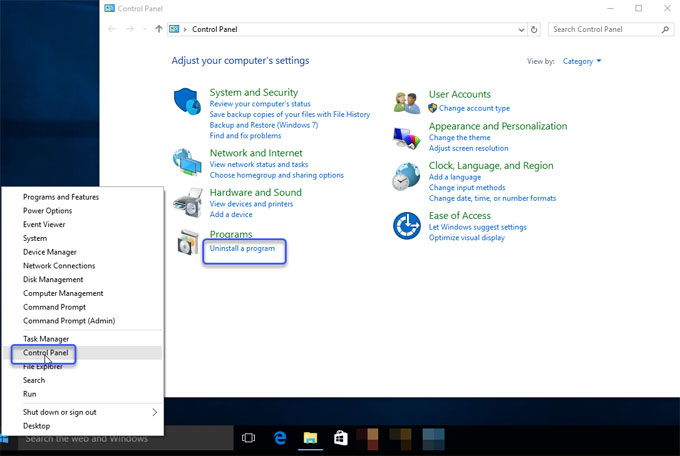
Highlight IDrive in the Uninstall or change a program window > right click & select Uninstall. Next, follow the pop-up prompts to finish the IDrive removal.
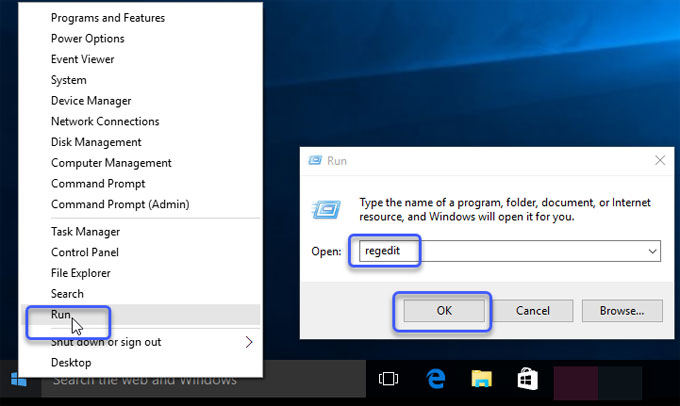
Step 3: Open Registry Editor and delete IDrive left entries there.
Right-click Start menu > click Run >Enter regedit in Open box > Press Enter key or click OK to open the Registry Editor window.
In the Registry Editor window > click Edit > Click Find option in the drop-down list> Enter the IDrive pathname in Find what box (the pathname differs according to you install location) > Click Find Next.
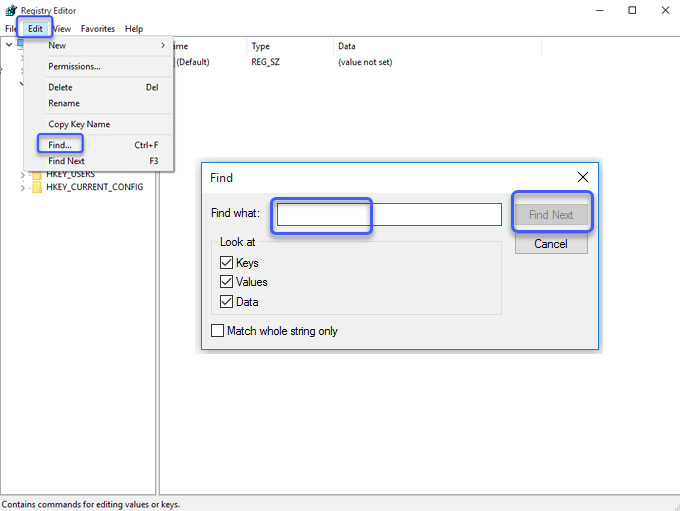
You need to manually and correctly delete leftover entries in the search results field. Any wrong deletion may cause some undesired troubles.
Method 2: Uninstall IDrive in Total Uninstaller
In this part, we'll know how to use a professional uninstaller tool to remove all unwanted programs just in a few of clicks. Now, let's look at how Total Uninstaller works.
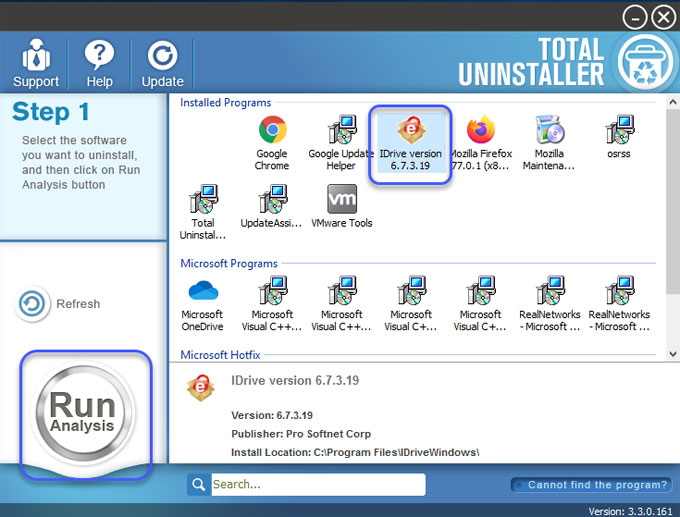
Step 1: Launch Total Uninstaller on your computer > Click IDrive > Click Run Analysis.
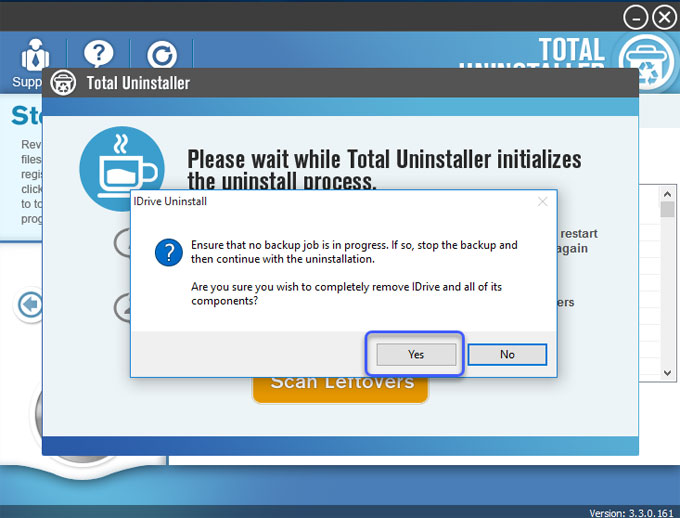
Step 2: Click Complete Uninstall > Click Yes to make sure that you wish to uninstall IDrive.
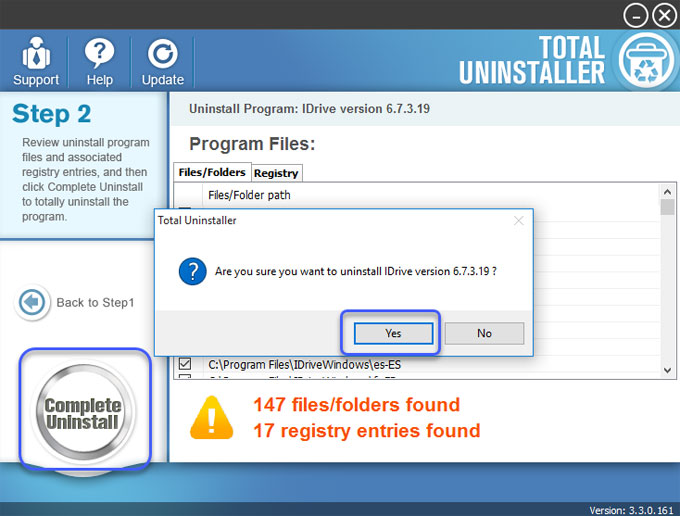
Click Yes to ensure that no backup job is in progress. And you are sure you wish to completely remove IDrive and all of its components.
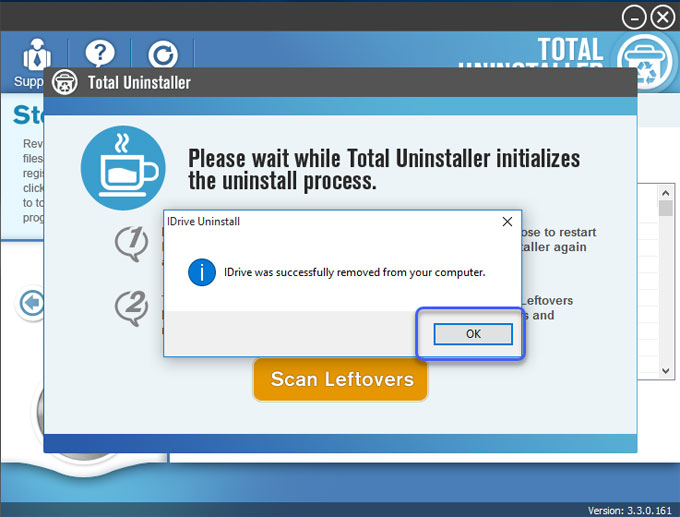
Click OK. IDrive was successfully removed from your computer.
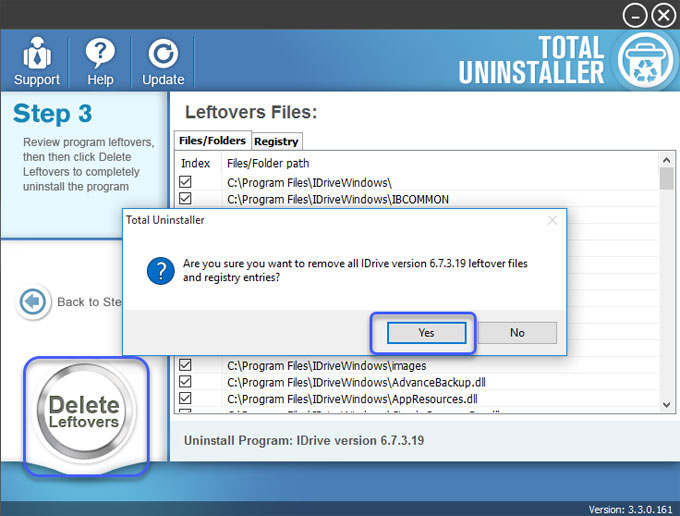
Step 3: Click Scan Leftovers > click Delete Leftovers > click Yes to make sure you want to delete all IDrive leftovers from your computer.
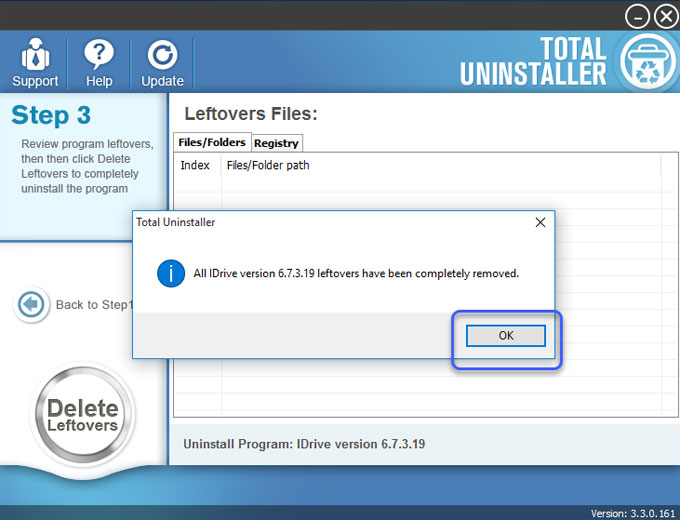
Click OK. All IDrive leftovers have been completely removed. Restart your computer.
Tips: Refer to a simple video guide on how to uninstall IDrive completely as followed.
Are you ready to have a try? Click the download button to install Total Uninstaller with ease.