Fail to uninstall Mega-Backup? Check out this guide
Wonder how Mega-Backup installs itself on your PC without your knowledge? Have no idea how to get rid of this PUP? Encountered problems during the uninstallation? Check out this tutorial to learn how to uninstall and remove Mega-Backup perfectly.
What you should know about Mega-Backup:
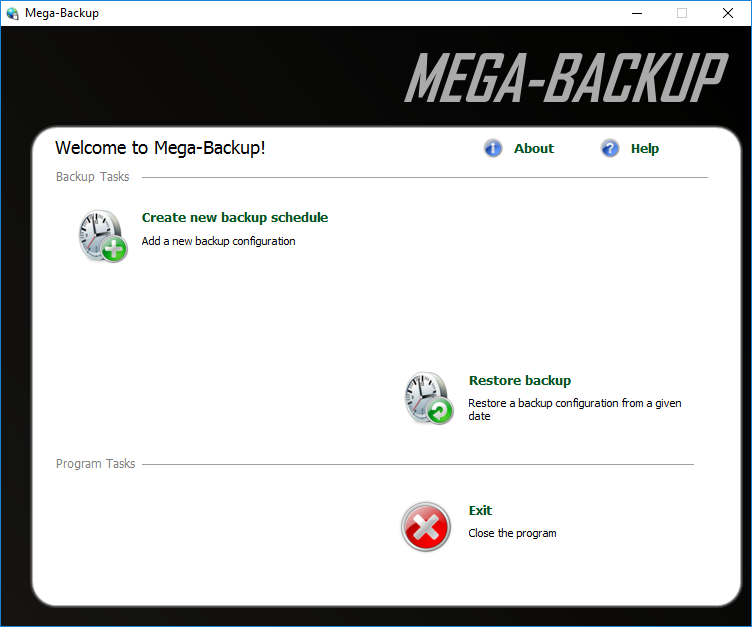
Mega-Backup is a cloud-based backup service that claims to help protect your data safe from laptop theft, accident files loss, or hard drive crash. This desktop client allows users to backup data to Amazon S3 cloud servers. It will integrate with your taskbar as well as contextual menu, and add a dedicate a folder as visible storage unit.
However, lots of users run into problems when using or uninstalling this program. As a paid software, it seems to make a profit from freeware bundle, which makes it not so trustworthy. Besides, Mega-Backup will generate many misleading notifications and insert ads when you surf the Internet. If you don’t mean to get this program installed on your PC, we suggest you to fully uninstall Mega-Backup from Windows right now.

In this tutorial we provide multiple ways of uninstalling Windows programs. No matter which way you decide to take, don’t forget to deactivate Mega-Backup before standard uninstall. To shut down Mega-Backup completely, do the followings:
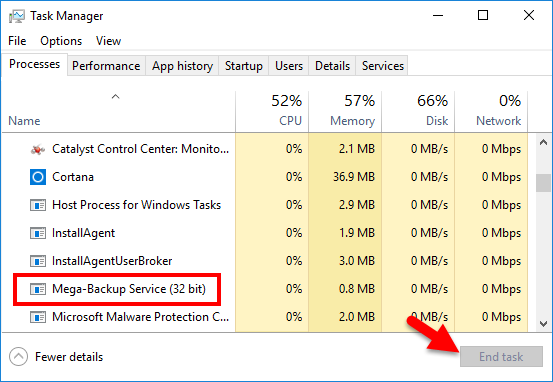
- Press Ctrl+Shift+Esc keys together to bring up Task Manager.
- Select Mega-Backup process, and click on End Task button.
Way 1: Uninstall Mega-Backup from Control Panel
If you want to uninstall Mega-Backup manually (totally free), then take this method. Here are the detailed steps for different OS users to perform a basic uninstall.
For Windows 7 users:
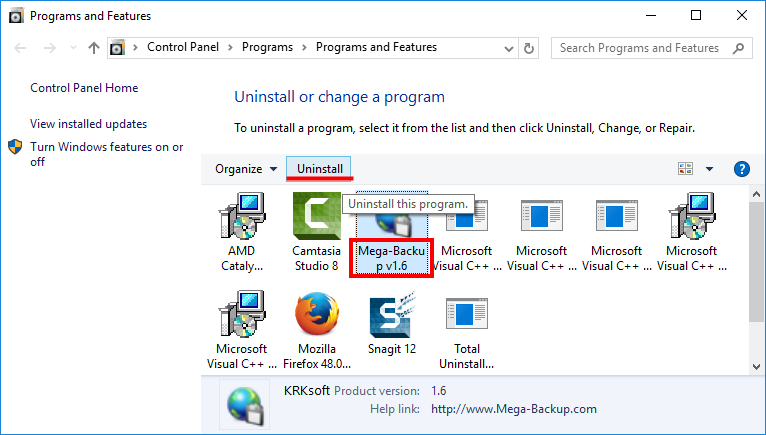
- Access to Start > Control Panel > Program to open Programs and Features panel.
- Scroll through to locate Mega-Backup, select it and then click Uninstall button.
For Windows 8/10 users:
- Right click Start menu and then click Programs and Features from the list.
- Highlight Mega-Backup with one click, and click Uninstall to start the process.
Well, Windows 10 offers multiple ways to uninstall a program. So here they are:
- Click Start > All apps to open the full list of installed programs.
- Locate Mega-Backup, right click on it, and then click Uninstall button.
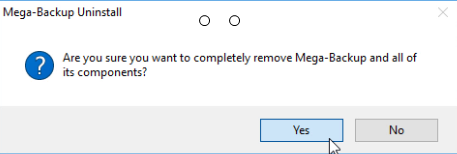
- In the opened window, click on Uninstall, and then click Yes to confirm the request.
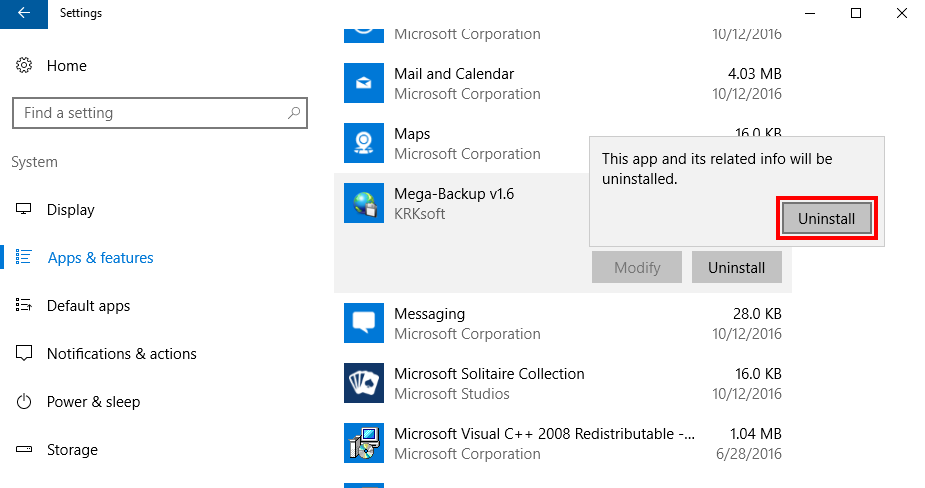
You can also uninstall Mega-Backup from the Settings app. Just head to Start menu> Settings > Apps & features, select Mega-Backup from the list, and click Uninstall.
As the Mega-Backup Uninstall window pops up, click Yes to start removing this program, and then click OK to exit the Uninstall wizard when the process is complete.
Way 2: Run Mega-Backup Built-in Uninstaller
Most Windows programs come with their dedicated uninstallers (usually located in installation folder). Luckily Mega-Backup is not an exception. So here are the alternative: you can perform the uninstall by directly activating its uninstall program.
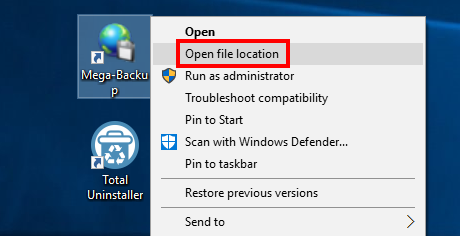
- Right click on the Mega-Backup icon and choose Open File Location.
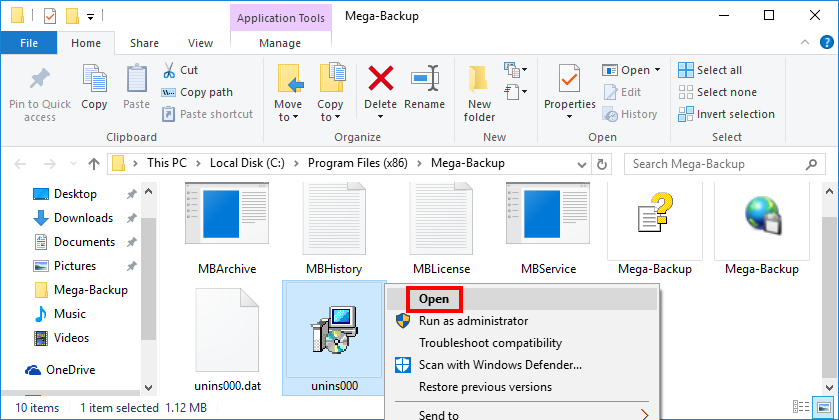
- In the installation folder, locate the executive file named Unins000.
- Right click on this program and choose Run from the contextual menu.
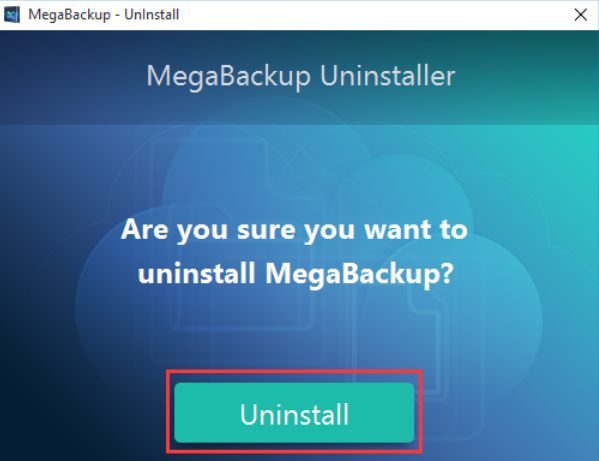
- Click Uninstall in the uninstall wizard, and follow the onscreen instructions.
Tip: If some of the executive files are damaged or deleted, the aforementioned ways may fail to work effectively, and issues appear like Mega-Backup doesn’t show up in the list of installed programs, or the uninstall process is stopped by unknown error. If that’s what you are faced with, try this solution: re-install Mega-Backup to cover corrupted/missing files, and then uninstall it after rebooting in Safe Mode.
Extra Steps to Remove Mega-Backup Leftovers
What upsets most users is that they cannot get rid of Mega-Backup thoroughly. Even it has been uninstalled, Mega-Backup still keep some of its components on the system that are hard to detect and remove. That’s why you should continue with these steps:
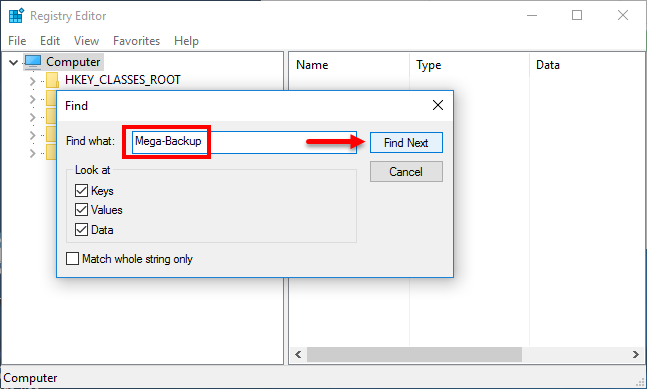
1. Delete entries in registry
- Go to Start > Run, type "regedit" and hit Enter to launch Registry Editor.
- Click Yes if you are prompted to give confirmation in UAC dialog.
- Click the Find from Edit menu, type Comodo in the Find box, and then hit Enter key to start searching matched items in Registry.
- Once found, right click on the key or value and choose delete option from the list.
- Hit F3 to locate the next entry associated with Mega-Backupsistant.
Warning: You must be very cautious when making changes on Windows Registry. Inexperienced users are not recommended to modify the registry without making a backup copy, cause serious issues may occur if you mistakenly delete keys or values there. If you are not confident in accomplish this part, we suggest you to utilize an professional uninstaller or a registry cleaner to get the job done automatically.
2. Remove leftovers in disk
- Head to Start > Control Panel > Folder Options, and then select the View tab.
- Check the "Show hidden files and folders" in Advanced settings and click OK.
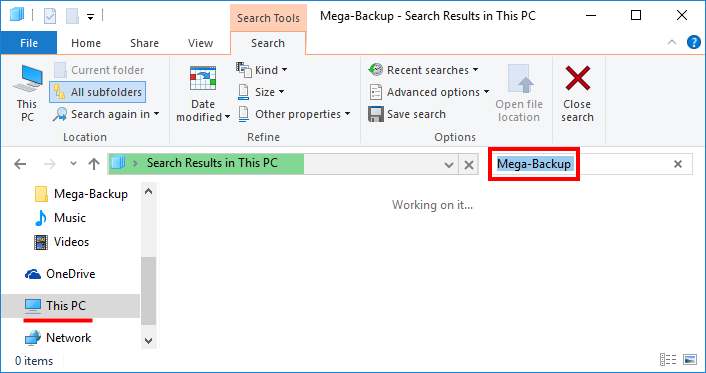
- Click This PC on the desktop (or press Windows + E ) to open File Explorer.
- Type Mega-Backup in the Search Bar, and wait for the scanning result.
- Identify and delete Mega-Backup components in the search result.
The two options listed above requires you to carry out the uninstallation manually, which means you need to spend much time & energy to get the job done. For average users these instructions might be a little confusing and complicated. If you are desired to uninstall Mega-Backup effortlessly, try the recommended solution below.
Recommended Option: Remove Mega-Backup in 3 Simple Steps
Tired of performing so many steps to uninstall Mega-Backup? Desired to find an one-station solution to resolve various program issues? Then a reputed uninstaller might be what you’re looking for. Take a brief look at the video clip to see how Total Uninstaller works to help you uninstall Mega-Backup without a trace left.
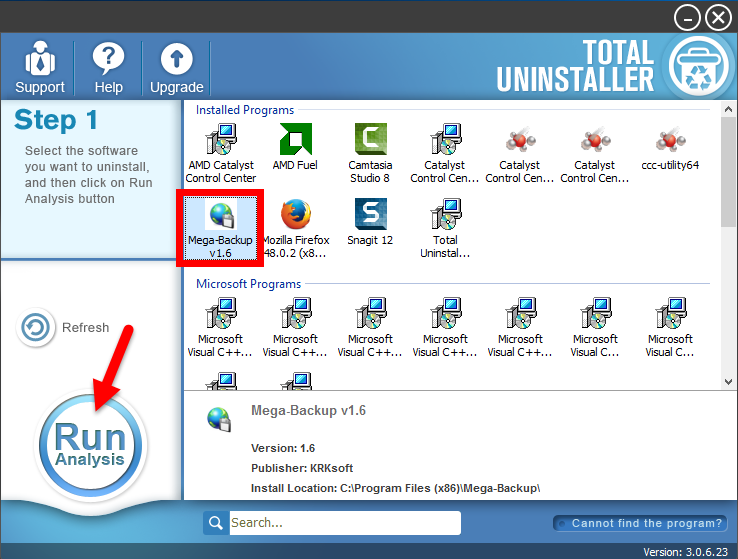
Part 1: select target program
- Install and run Total Uninstaller after totally shut down Mega-Backup.
- Select Mega-Backup icon in the interface, and click on Run Analysis.
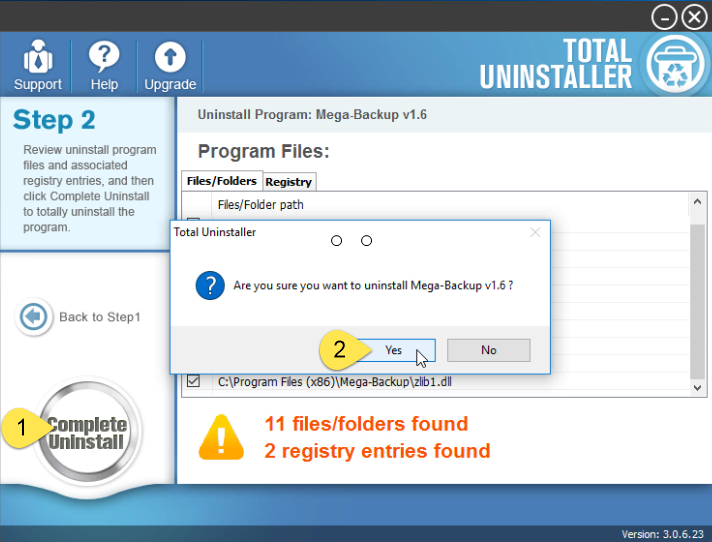
Part 2: perform the uninstall
- Click on Complete Uninstall after all the components have been scanned out.
- Click on Yes in the pop-up dialog and follow the onscreen instructions.
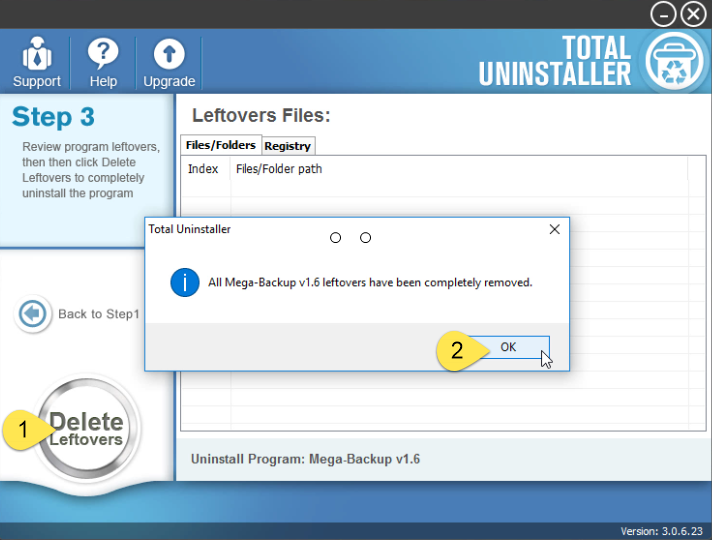
Part 3: delete program leftovers
- Click Scan Leftovers and then Delete Leftovers to perform a thorough uninstall.
- Click Yes in the confirmation dialog, and then OK to complete the removal.
Well, that’s the whole steps you need to take to fully uninstall Mega-Backup. Incredibly simple, right? Just a few clicks and you will get any PUP fully removed.
Tip: For the program that does not appear in the interface, you can perform a force uninstall to get rid of it. Here is the process: click “Cannot find the program” button in Step 1, specify the installation folder of target program in the pop-up window, and click Scan button to continue uninstallation with Step 3. Force Uninstall Mode can be used to effectively remove those corrupted/problematic/malicious/stubborn programs.
Feel free to leave your comment here, or contact us for help if needy.